What's new
Van's Air Force

Don't miss anything! Register now for full access to the definitive RV support community.

Tip: Lower Cowl Installation by Yourself

cfiidon

Well Known Member
I came up with this method of putting the lower cowl in place on my RV-8. Others have also supplied tips, but I wanted something that was small and lightweight to carry in the airplane. I envisioned having to replace the lower cowl on a windy ramp at night on an isolated ramp somewhere.

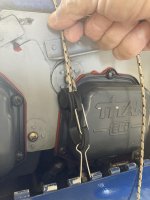
The pictures show using the "handles" from large binder clips to slip in the cowl hinges on the sides. The parachute cord simply loops over the baffling. I can inch the cowl up into place one side at a time without scraping it on the ground.

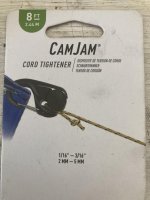
I bought the the rope and tension pieces in the Home Depot Aviation department. You could probably get away without that part if you are good at bowlines and slip knots.


Don
 
I came up with this method of putting the lower cowl in place on my RV-8. Others have also supplied tips, but I wanted something that was small and lightweight to carry in the airplane. I envisioned having to replace the lower cowl on a windy ramp at night on an isolated ramp somewhere.

The pictures show using the "handles" from large binder clips to slip in the cowl hinges on the sides. The parachute cord simply loops over the baffling. I can inch the cowl up into place one side at a time without scraping it on the ground.

I bought the the rope and tension pieces in the Home Depot Aviation department. You could probably get away without that part if you are good at bowlines and slip knots.


Don

Now that you can post pictures directly on VAF, would you please post some pictures of your device?
 
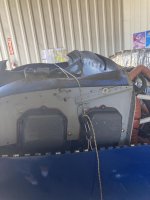
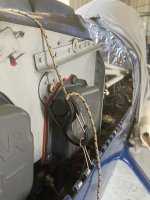
Here are some pics I took to support my original post. This tightener works in the shop but you would need longer cords for out on the ramp. Any tightener would do.

I clip in at the balance point on the lower cowl (12-13 spaces from the front for me). I can walk the lower cowl in position one side at a time.

Frankly, it's easier to do this way than with two people.

Don
 

Attachments

  • Lift1 (1).jpg
    Lift1 (1).jpg
    253.1 KB · Views: 273
  • Lift1 (2).jpg
    Lift1 (2).jpg
    273.7 KB · Views: 278
  • Lift1 (3).jpg
    Lift1 (3).jpg
    243 KB · Views: 261
  • Lift1 (4).jpg
    Lift1 (4).jpg
    268.1 KB · Views: 276
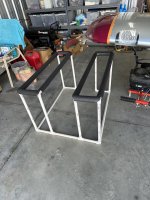
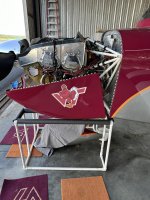
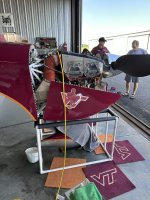
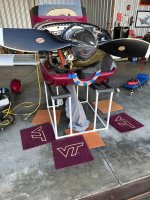
For those with A models

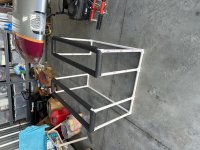
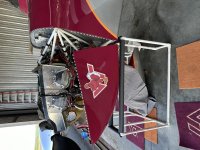
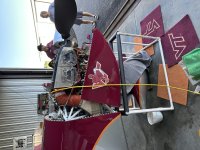
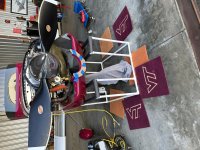
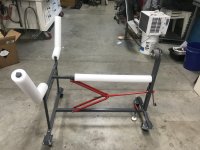
I made a cowl catcher out of 3/4” PVC and pipe insulation.
 

Attachments

  • IMG_0054.jpg
    IMG_0054.jpg
    505.3 KB · Views: 162
  • IMG_0053.jpg
    IMG_0053.jpg
    494 KB · Views: 162
  • IMG_0052.jpg
    IMG_0052.jpg
    509.9 KB · Views: 152
  • IMG_0051.jpg
    IMG_0051.jpg
    589.8 KB · Views: 159
Cowl helper....

Here are some pics I took to support my original post. This tightener works in the shop but you would need longer cords for out on the ramp. Any tightener would do. I clip in at the balance point on the lower cowl (12-13 spaces from the front for me). I can walk the lower cowl in position one side at a time. Frankly, it's easier to do this way than with two people. Don

Super cool idea! And it will work for most other hinged cowls as well. I don't have problems with my -4 but just might look into getting this setup to make putting the lower cowl on easier! Thanks!
 
If You Want Something More ...

and are a fabricator -

HFS

HR II S/N 002
 

Attachments

  • Cowling “Puter Oner” - 3.jpg
    Cowling “Puter Oner” - 3.jpg
    227 KB · Views: 165
  • Cowling %22Puter Oner%22 - 2.jpg
    Cowling %22Puter Oner%22 - 2.jpg
    236.3 KB · Views: 168
  • Cowling “Puter Oner” - 4.jpg
    Cowling “Puter Oner” - 4.jpg
    326.7 KB · Views: 173
Lotta different ways to skin that cat …
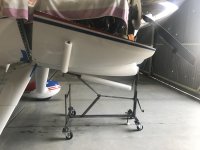
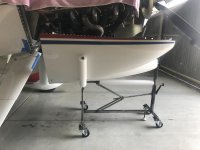
built an attachment to my Harbor Freight lift (which came in very handy during the build). it lets me sneak it down and out through my 3 bladed prop.
 

Attachments

  • cowl lift 1.jpg
    cowl lift 1.jpg
    111.3 KB · Views: 106
  • cowl lift 2.jpg
    cowl lift 2.jpg
    120.1 KB · Views: 102
built an attachment to my Harbor Freight lift (which came in very handy during the build). it lets me sneak it down and out through my 3 bladed prop

I did something similar. Works great.
 

Attachments

  • CI24-004.jpg
    CI24-004.jpg
    1.3 MB · Views: 62
  • CI24-005.jpg
    CI24-005.jpg
    1.9 MB · Views: 59
  • CI24-006.jpg
    CI24-006.jpg
    1.4 MB · Views: 52
  • CI24-006A.jpg
    CI24-006A.jpg
    1.1 MB · Views: 58
I guess I don't understand the issue. I've never had a problem removing or installing the lower cowl on my -6 or -8 by myself. Is this just idle hands syndrome? lol Same reason I hooked up my 20 year old coffee maker to my wifi so I could tell Alexa "turn the coffee on" I guess.
 
I guess I don't understand the issue. I've never had a problem removing or installing the lower cowl on my -6 or -8 by myself. Is this just idle hands syndrome? lol Same reason I hooked up my 20 year old coffee maker to my wifi so I could tell Alexa "turn the coffee on" I guess.
When you get to be 75+ (and maybe you already are), you'll know why - along with a lot of other physical restrictions that come with getting old!

HFS - 75 & counting ...
 
I guess I don't understand the issue. I've never had a problem removing or installing the lower cowl on my -6 or -8 by myself. Is this just idle hands syndrome? lol Same reason I hooked up my 20 year old coffee maker to my wifi so I could tell Alexa "turn the coffee on" I guess.
I don't have issue with installing the lower cowl by using a simple step stool method either. I just jam a piece of foam between the step stool and the cowl and the whole contraption stays firmly in place while I manipulate the front baffling material and inserting the pins. This is also helpful when I need to remove the cowl at a distant airport. One other advantage of using this method is the stepstool supports the weight of the cowl and my job is only to position the cowl properly and to move the stepstool to approximately the location below the engine and jam it tight. If I use other customized tool in the pictures above then it is problematic if one doesn't have the tool.

Here is the picture of my setup.
cowl.jpg
 
I guess I don't understand the issue. I've never had a problem removing or installing the lower cowl on my -6 or -8 by myself. Is this just idle hands syndrome? lol Same reason I hooked up my 20 year old coffee maker to my wifi so I could tell Alexa "turn the coffee on" I guess.

I can do it without the lifting tool but not without risking damaging the paint on the corners of the cowl. I went with Skybolt fasteners vs the Van's piano hinges and the corners of the cowl tend to catch on the Skybolt flanges mounted on the fuselage which can damage the paint. Using the lift table I can raise the cowl a little at at time while checking that the corners aren't catching on the flanges.
 
I guess I don't understand the issue. I've never had a problem removing or installing the lower cowl on my -6 or -8 by myself. Is this just idle hands syndrome? lol Same reason I hooked up my 20 year old coffee maker to my wifi so I could tell Alexa "turn the coffee on" I guess.
At least in our case, the 10 is a different animal. We've always needed two people to re-cowl the engine. Top is no problem, off and on. But if the lower comes off, getting it back on really is a 2-person job. I'm comparing other's designs of assistance tools to steal in the construction of a new one for the hangar ;)
 
Back
Top