What's new
Van's Air Force

Don't miss anything! Register now for full access to the definitive RV support community.

Flyleds Tail Dragger Max landing light

Paul from Flyleds

Well Known Member
Advertiser
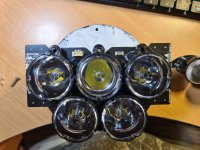
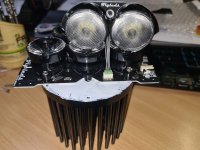
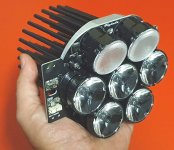
Introducing our newest all-in-one Landing and Taxi light, the Flyleds Tail Dragger Max.
TDMax4 800.jpg

Typically tail dragger aircraft align one light straight ahead for landing and the other light downwards for taxiing. Given how poor to average those lights usually are, and only having one light useful to you in each phase of landing, it's no wonder that night landings are not the most pleasant experience for many.

The Flyleds Combo light was introduced in 2018 and it completely changed that experience for hundreds of our customers. Now, based on our highly regarded Seven Stars light, the Tail Dragger Max has the top two light modules aimed 20° downwards (fixed). You get 6500 lumens of clear white light aimed straight ahead in a tight beam for landing, plus another 2500 lumens of light aimed lower, closer and wider, so that you can still see where you're going when the tail is on the ground.

In comparison your average 50 watt halogen headlight fitted to so many RV's is a poorly formed beam of yellow light around 500-700 lumens.
Just the landing light section alone of the Tail Dragger Max light is 8-10 times, or double, then double, then double again (plus a bit more!), the amount of light.
Stop and think about that for a second!

The Tail Dragger Max has two power inputs. The Main input lights up all seven light modules for 7-8 amps draw, while the second (optional) Taxi input turns on just the top two lights at ~2 amps draw. High beams/low beams if you like!

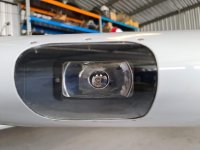
Designed to fit a PAR36 mounting hole in your leading edges. It will drop right into your RV-14 light bay onto the W-00017 bracket supplied as part of the wing kit. It will fit into the various Van's and Duckworks light bays found on other RVs as well, not to mention your Cub etc... If you have rectangular halogens in your leading edges now it's usually just four screws to remove the bracket from your wings and you can enlarge the hole out on the bench in minutes.
TDMax JH 800.jpg

The best landing light available that is specifically designed for your tail dragger aircraft. There's nothing else on the market like it!


retrofit 7-star?

Paul- Any way an existing 7-star can be retrofitted with the angled upper lenses?
 
Paul- Any way an existing 7-star can be retrofitted with the angled upper lenses?

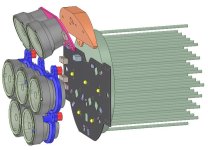
Hi Greg. Technically yes but practically no... you'd be changing the fillings in your sandwich, so to speak! The heatsink and the lenses are the same but the circuit board(s) and mounting arrangements are different. You'd end up with two expensive and perfectly good but unusable circuit boards sitting on the shelf.

I'm sure you could sell your Seven Stars in the VAF classifieds at a small discount and replace them with the Tail Dragger Maxes.

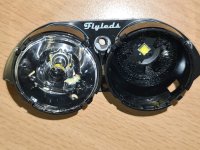
TDMax exploded 2.JPG


A Dynamic Duo...

RV-8 Lighting Retrofit:

(1) W-715 "Bat wing" tips with Aeroflash pos/strobe to FlyLEDs Original
Outstanding kit; quality parts, detailed instructions, perfect fit, and WOW... what a difference!!!

(2) Dual landing lights from rectangular halogen (worthless orange spots on the hangar door) to FlyLEDs Tal Dragger Max. Oh My!! I thought the headlights on my new Tahoe were extreme... these babies give new meaning to extreme and the new design (top two lights pointing down) works perfectly without need to enlarge the original Duckwork lens opening. I'm a VERY HAPPY camper.

I've only seen one aircraft with brighter lights than my -8; my neighbor's RV-10 with Combo lights in the tips and 2-Seven Star landing lights.

Those of you who've done business with Paul know that the only thing better than FlyLEDs lighting systems is his customer service. Combine that high level of customer service with his US partner, Blake at Flyboy Accessories, and you have a Dynamic Duo!
 
Last edited:
Will these wig wag no problem with your control board or the GAD 27?
Hi Ed

No problems at all. All of our lights just need 12 volts and there will be (a whole lotta!) light.
They can be run from our The Works controller board in addition to The Works lights, our Wigwag Module or the Wigwag Switch, a Garmin GAD27, a VP-X, or an Advanced/Dynon ACM.

Use a separate switch and run 18 or 20AWG wires for the Taxi power inputs. The tilted taxi lights take power from either input via two diodes, so there is no adverse interaction between the two power inputs.


RV-8 Lighting Retrofit:
Those of you who've done business with Paul know that the only thing better than FlyLEDs lighting systems is his customer service. Combine that high level of customer service with his US partner, Blake at Flyboy Accessories, and you have a Dynamic Duo!

Thank you for the kind words Ernie! We both aim to keep our customers smiling.


Hi all

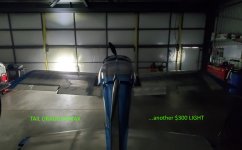
It's been more than a year since we launched the Tail Dragger Max light, and we've sold quite a few since then! We know they are flying in (at least) RV-7s, -6s, -4s, and a Murphy Rebel as well.
I'm interested to hear your feedback, particularly from those who have flown with the lights. We'd love to know just how much of a difference these have made to your night landings. Pictures especially appreciated!

TDM comparison.jpg
(Thanks Bill)

Click here for the product page, or the Flyleds logo below.
 
Haven’t flown my new ones in the Rocket project, but building them was easy, fun - and a nice break from doing cockpit interior nutplates…..

Can’t wait to fly with these!
 
Warning. Long post. Lotsa pictures! I hope Paul doesn't mind me adding this to his thread.

Assembling the Tail Dragger Max

While attending, Ausfly, the Sport Aircraft Association of Australia's national fly in earlier this year, I visited the Flyleds display, and made a spur of the moment decision to upgrade the 55W halogen Duckworks landing lights in our RV-6. To be fair Paul did offer a show discount which helped, but honestly I think I was already sold when he said they'd fit in the Duckworks bracket with no issues. I had been tossing up between the Combo Landing/Taxi light or the Tail Dragger Max as I wasn't sure the latter would fit in my wings. Thank fully I didn't need to compromise because like cubic inches, you can never have enough lumens ;)

This is what I was upgrading:
20220108_180322.jpg


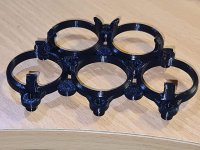
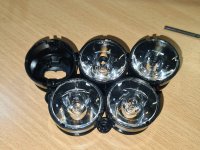
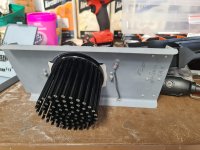
When the Tail Dragger Max's, (yeah two of them!), arrived they were really well packed. Putting each of them together with the help of the instructions was easy. I launched straight into it after work one day and had them done in no time. First came fastening the spacers to the 3d printed lens holder. First hurdle - I didn't have acetone at home, Not willing to use CA based glues I opted for a locally available solvent based glue called Tarzans Grip. The smallest amount helped hold the spacers in position. This is probably a good time to check the screws fit in all the holes of the lens holder frame and spacers - I only checked a couple on the edge and assumed the rest would be ok :rolleyes::20240330_221223.jpg

Clipping the lens cups and lens into the frame was very straightforward. Taking note of the fact that I'd be clipping the lens into the cup while the cup was scrwed over the Taxi LED's in the following steps, I tried very hard to make sure the lenses went in straight - it seemed like a good time to practice.20240330_235457.jpg


As all four Taxi LED's are operating I have to assume I clipped them in square enough to not destroy the LED's:
(Speaking of which, It's unbelievable the amount of light that comes from something 1/4 the size of my pinkie fingernail!)
20240331_000451.jpg


When it came time to spread the heatsink compound on the heatsink, I used a snap off blade from a utility knife. There is exactly the correct amount of heatsink compound supplied once it's been evenly & thinly spread over the heatsink mating surfaces. Mounting the Landing LED's to the heatsink was a easy enough - getting the centre screws in the holes after you haven't check they'll go in without cleaning them up with the 1/8" drill means careful removing the lens frame from the LED board which stayed in position thanks to the heatsink grease:20240331_001444.jpg


Adding the Taxi LED board seemed easiest by plugging the interconnect into the Taxi LED board first and the lowering the other end onto the main board where I helped the connector engage with tweezers. It was then a half turn of the LED board to lower it into position. At this point I'd left the main board screws loose to allow wiggle room for final positioning:
20240331_001822.jpg


I then tightened all the screw and checked for squeezout of the heatsink grease. Some minimal squeezout so I guess I got the right amount:
20240331_002311.jpg


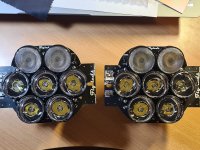
Two completed Tail Dragger Max's:
20240331_002458.jpg

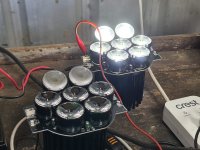
And bench testing in the hangar:
20240331_102739.jpg

To be continued... (the more difficult bits)

Don H
Sydney, Aus
 
Last edited:
Part 2. Installing the Tail Dragger Max's in the wings.

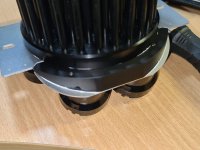
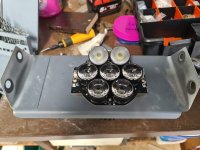
Because the old lights I had were rectangular halogen's I needed to modify the brackets to take the round heatsink. I cut the aluminum bracket with a thin cutoff wheel in the Dremel, and finished to the marked line with a sanding drum. I allowed an extra 1/16" clearance to provide a bit of wiggle room with the screw holes - more than necessary as it turned out. 1/32" would have been fine. The screw holes in the LED board aligned perfectly with the nutplates in the bracket:
20240331_122341.jpg


Rear view. (Yes I replaced the old black automotive earth wire with 14 gauge tefzel.)20240331_122403.jpg

At this point I moved onto wiring in the Wig Wag module, replaced the existing 10A Potter & Brumfield breaker switch with a 20A unit, and added a dedicated MS35059-22 DPST switch to bypass the Wig Wag and switch both lights on. I elected to use a dedicated switch instead of having greater wear & tear that would occur over time by flicking the P&B breaker switch on and off to activate the different modes on the Wig Wag module.

Most of the rest of the installation into the wings will be words only as this was fairly challenging work. On the right wing I found it necessary to relieve the holes in the bracket to provide a better angle for the bracket to be parallel to the spar. This has more to do with the positioning of the nutplates riveted to the ribs on our plane than any issue with fitting the Tail Dragger Max in the bracket or wing.

I also drilled two additional 1/4" holes in the bracket near the LED 12v & Ground connectors with grommets to provide a pass through for the new earth wire and 12V from the Wig Wag module. Our RV-6 is only day VFR at this stage so the main benefit at the moment is better visibility and the Wig Wag mode helps with that.

As our wing tips are riveted on, the bracket, landing light, and lens installation was done through the leading edge cut-out. It felt like doing key-hole surgery without all the skinny waldos. A friend suggested that I needed to have the lens in the wing before screwing the bracket in place. On the right wing a dry-run seemed confirm this would be needed for me as well. However when installing the left side I could not seem to get the bracket screws in with the lens in the wing, and while struggling with this, one corner of the lens popped out of the leading edge opening and so I removed the lens. As my lenses have a fair bit of perspex beyond the lens nutplate brackets I sanded to within 1/8" of these bracket along the top and bottom and polished the edges. This allowed me to easily screw the Duckworks bracket in without the lens in the way and the lens was able to be installed after. This is something I may revisit on the RHS if I ever need to remove the lens again.

I put the bracket in the wing, followed by the landing light. I could then screw the landing light into the bracket, I then put the lens into the wing and slid it as far to one side as possible so I could put the bracket screws for the side of the bracket away from the lens in. Leaving them loose I moved the lens to the other rib and installed the other two screws. Using .040" stainless safety wire bent into screw holders and hooks allowed me to position the bracket and screws to get everything in place. At this point this is what I had:
20240512_143545.jpg
Seeing the Tail Dragger Max on the right wing compared to the old on the left made all the new swear words worth it!


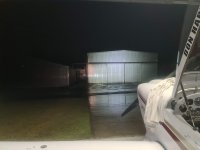
As I wasn't going to get the left wing done that day, I tidied up, waited 'til dark and took some more photo's and video:
20240512_174941.jpg


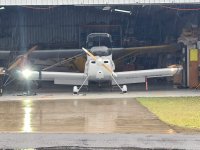
A quick & dirty video showing the difference between a 55W halogen and the Tail Dragger Max - It's night & day really :sneaky::ROFLMAO:

I have yet to take photo's with both sides installed, but while practicing formation last Sunday, with me in trail behind lead, 2 commented he could see the reflection of my lights on the bottom of leads wing. It was a nice bright sunny day. I'm calling the mission to burn retinas at 10 miles accomplished.

Don H
Sydney, Aus
 
Many thanks for the write up Don! It will be very useful for anyone wondering what's involved in both assembling Flyleds lights and installing them in an existing bracket.
Your comparison video had me laughing out loud in the first ten seconds and continued to impress all the way through! It was never going to be a fair fight, was it?

So, who still thinks their halogens are "good enough"? :cool:

 
Paul's products aren't "retina melting", they're "face melting". Good stuff and super bright.

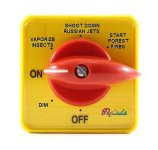
Kinda makes me wonder if he's got a dimmer circuit for them also. If not, here's a suggestion:

FlyLEDs dimmer switch.JPGPotential FlyLEDs dimmer switch
 
Back
Top