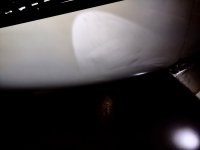
The epoxy honeycomb cowl on my 24 year old RV-6 has developed a large delaminated bubble on the outside, and matching one on the inside. Some questions:
1) Why - is it simply age? The area is not particularly close to exhaust pipes and shows no signs of excessive heat on the inside, and SCAT tubes in the same area and even closer to the pipes show no burning of any kind.
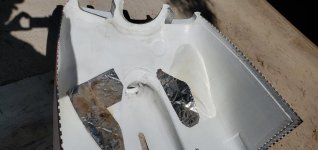
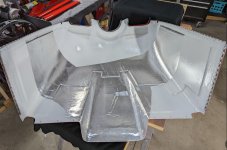
2) Suggestions on the repair? I built the plane and did all the fiberglass work, but I haven't done a repair of this type. I guess the whole area will need to be cut out and patched - just with layups or would I put in some kind of honeycomb or foam substrate?
3) Has anyone else with an aging (or not) RV experienced this sort of thing?
1) Why - is it simply age? The area is not particularly close to exhaust pipes and shows no signs of excessive heat on the inside, and SCAT tubes in the same area and even closer to the pipes show no burning of any kind.
2) Suggestions on the repair? I built the plane and did all the fiberglass work, but I haven't done a repair of this type. I guess the whole area will need to be cut out and patched - just with layups or would I put in some kind of honeycomb or foam substrate?
3) Has anyone else with an aging (or not) RV experienced this sort of thing?