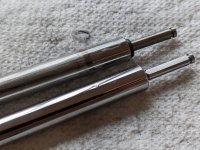
So I have my brake master cylinders at home to change the o-rings, and I'm really puzzled about the main spring. What I see doesn't match the instructions... My main spring is bit more than 3 1/2" long at rest, but the instructions say "Measure spring (8) for a minimum free length of 4.55 inch." (Per the diagram, part number "8" applies to 10-30, 10-30A, and 10-30D. My data plate is stamped "10-30".)
That's a huge difference! I can't believe that normal usage over 20 years would compress it that much.
Maybe a coincidence, but next sentence says "Measure spring (8A) for a minimum free length of 3.60 inch." However, the diagram shows that "8A" only applies to the 10-30C, and I very clearly don't have that! That model would have a clevis-style rod end and extra mounting brackets on the cylinder. Maybe I have a 10-30 rod with a 10-30C spring? But on all 4 master cylinders... I don't believe that either.
What am I missing here? If the spring really was 4.55" long, it would take some crazy pressure to compress it down to get the rod-end clip installed.
I did verify that with my (incorrect? shorter?) spring, there is enough pressure to counteract the tiny spring (part "11") so the resting position opens the fluid bypass valve. That's what really matters, right?
I'm using the Cleveland 199-512 rebuild kit. Aircraft Spruce says this applies to "10-30, 10-30A, 10-30C, or 10-300":
https://www.aircraftspruce.com/catalog/appages/06-01130.php
And I'm following these instructions:
https://www.parker.com/parkerimages... Brake Division/Kit Documents/199-512 Kit.pdf