A few years ago, I came up with a simple low cost interconnect board for SkyView. I finally made a mock-up using the board in a RV7 Panel. It shows you a simple, neat install using the board.

This is a top view of the front and sub panels with the board and most SkyView modules installed in/on the two panels.

This is a shot through the left screen panel hole. Allows easy access to the board and the transponder and ADSB In Receiver. The right panel gives you easy access to the EMS, ARINC429, and the Dynon Comm Receiver, or whatever you put on the left and right.

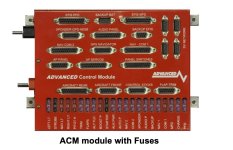
This is a shot of the Interconnect Board looking down from the top of front panel.
Everything makes all the connections through the Interconnect Board, and allows easy expansion of the system, as you buy new components, like second screen, and servos. Mount the board, make your own harnesses, connect the modules, then program the SkyView. Easy Peasy.
Brian
This is a top view of the front and sub panels with the board and most SkyView modules installed in/on the two panels.
This is a shot through the left screen panel hole. Allows easy access to the board and the transponder and ADSB In Receiver. The right panel gives you easy access to the EMS, ARINC429, and the Dynon Comm Receiver, or whatever you put on the left and right.
This is a shot of the Interconnect Board looking down from the top of front panel.
Everything makes all the connections through the Interconnect Board, and allows easy expansion of the system, as you buy new components, like second screen, and servos. Mount the board, make your own harnesses, connect the modules, then program the SkyView. Easy Peasy.
Brian
Last edited: