What's new
Van's Air Force

Don't miss anything! Register now for full access to the definitive RV support community.

RV-7 salvage recovery

RV-7A salvage recovery

Hi everyone

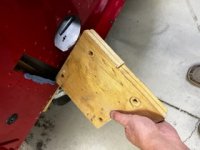
I recently bought an RV-7A that was auctioned off for salvage due to it being written off in a rough landing(pilot got out ok)

I’m good with the loading and transportation of the plane onto a trailer

But I had some questions about taking the plane apart … is the assembly of the … tail, ailerons, flaps, wing attach bolts … ect… all standard nut sizes/no special tools required

I have a PDF of the plans.. but wondered if there are any gotcha spots on the plane that are tricky to dis assemble

It’s in a remote location… wanted to make sure I have all necessary tools… any recommendations/tips and tricks welcome


Years ago I was working on an RV-7 and sold it due to family commitments… I got to the wing stage


Thanks
 
Last edited:
Your biggest challenge is getting the wing bolts out - they are VERY tight.
We disassembled a 7 & a 9 remotely with hand tools, 2 pound hammer, a variety of hand tools & 3 times the time we thought it would take.
Take multiple wrench sets, multiple socket sets, multiple sizes of brass punches, engine hoist (for wings & engine), multiple screw sets, drills for broken screw heads, things to prop & cushion all assemblies, & lots of friends.
If you have capacity for a compressor, impact tools would be a great help.
Good luck

That’s some solid advice… much appreciated

Also the others in the thread that added good tips
 
Last edited:
Ralph's list is spot on.

I would add wire cutters, flashlights, Ziplock bags to put hardware in, and a Sharpie to label the bags. You may also want some light oil to lube the wing bolts when you knock them out.
 
Penetrating oil, Mouse Milk or? Get the nuts off the wing bolts first and give them a squirt, let it sit while doing something else, then go back to it. Take some clamps and clamp next to the bolts where you can to keep the “sandwich” of extrusion, web, and bulkhead solidly together while you drive the bolts out.
Take a heavy bucking bar or whatever and back the bulkhead while driving them out to help reduce the flex. Cover anything that touches the bulkhead or spar with tape and try to avoid marring and denting.
Mark all the wires if they where not already marked well.
 
There's a couple place where having a small wrench at unusual angles (not sure what they are called, but they are "crooked" compared to normal wrenches) would help, and a few places where having very thin wrenches would help.

Also a few places where having a thin wall socket on the end of a flex style ratchet extension would be helpful, even if you have to break it loose with something else first (nothing worse than unscrewing a nut one ratchet click at a time).

Also, I would add flush cutters (for the wires and existing zip ties), and I would try to cut any wires at one end or the other, and then unsnake them if possible. When reassembling (assuming you are going to reuse the wires), you probably have enough to attach the pins/ring terminals/etc with out having to add back wire.

I would a couple rolls of good tape, for taping things down/closed for transport, to protect from rain infiltration etc. And painters tape for marking things.

For the trailer load, I've seen large pieces of memory foam work well, for padding between the wings, other pieces and the trailer bed.

If it's really remote, might want to take bug spray, and something to sleep in, could take longer than you think...
 
There's a couple place where having a small wrench at unusual angles (not sure what they are called, but they are "crooked" compared to normal wrenches) would help, and a few places where having very thin wrenches would help.

Might be…..
“Cromwell” or Offset Wrenches( correction, Angle
Head” heads are at a different angle. “Offset” the shaft bends down. Equally useful. I have a set and can not tell you how many times they have saved my butt, or made things much easier. That slight change in angle might be all you need to get on a bolt or nut when they are in tight spots.
 
Last edited:
7 disassembly

Be careful if hauling the tailwheel models on their gear. The tail spring weldment is secured to the rear bulkhead with the vert stab-rear spar attach bolts. If transported on the gear without these bolts installed a pothole can cause damage the rear bulkhead. I would bring extra hardware to secure the weldment to the rear bulkhead.

Don Broussard
RV9 Rebuild in Progress
57 Pacer
 
wing bolt removal

I would also make drift pins from hardware bolts with the threads cut off and then ground to a dome shape to aid insertion. Each time you drive out a close tolerance bolt for the wing spar attach structure, place a hardware bolt/drift pin in the hole that the close tolerance bolt was in. This will help support the weight of the wing and make driving out the remaining close tolerance bolt a little easier. Eventually you only have hardware bolts/drift pins supporting the wing and these are relatively easy to drive out when somebody holds the wing tip up. What makes this work is the hardware bolts/drift pins are a smaller diameter than the close tolerance bolts that are pretty much force fit into the holes. Each time you remove a close tolerance bolt the wing droops a little making the holes just a little bit less aligned and creating more of an interference fit. The drift pins keep the holes a little bit more aligned and you need all the help you can get removing the wing bolts. I hope I never have to remove my wing bolts because it really was not fun putting them in.
 
Everything in to this point in the recovery has been smooth with the advice in the thread … tail off… aileron and flaps removed… ect … going along fine… until wing spar bolts removal …. Top bolts came out no problem….but

I changed the title of the thread to be more model specific… the recovery is for a 7A…. I can now see why you guys where saying that 7A wings will be hard to remove


I took a look under the hood … I’m scratching my head as to how to proceed to get the bottom bolts out…. Anyone that’s removed 7A wings … love to hear how did it … is it possible to remove the bolts and the gear stays on?

Thanks
 
Yes
Wood spacer blocks & hardware bolts to stabilize gear leg weldments.

I sacrificed a number of wrenches which were heated up, bent & shaped to specific angles to get to the lower spar bolts. Nearly each nut required a unique wrench.
 

Attachments

  • block.jpg
    block.jpg
    35.5 KB · Views: 105
Last edited:
Yes
Wood spacer blocks & hardware bolts to stabilize gear leg weldments.

I sacrificed a number of wrenches which were heated up, bent & shaped to specific angles to get to the lower spar bolts. Nearly each nut required a unique wrench.

Good advice… I’m going to bring a generator, grinder, hammer and vice…. So I can fabricate some tools on site

Pickup some cheap sacrifice wrenches, to grind and bend to shape

Another earlier post mentioned wood and pry bar

I’m going to wedge something behind the lower wing bolt nuts…between the nuts and main gear bracket… so they can’t come off… as I loosen the wing nut … it has nowhere to go so it will push the bolt forward… enough to get a pry bar under the head…I’ll ditch my socket wrench and put the socket on a breaker bar wrench… so the socket can get low to the floor … one guy turning the socket back and forth … another guy on the breaker bar, applying force..
 
Yes
Wood spacer blocks & hardware bolts to stabilize gear leg weldments.

I sacrificed a number of wrenches which were heated up, bent & shaped to specific angles to get to the lower spar bolts. Nearly each nut required a unique wrench.

I’m now realizing I should have bought the plans/instructions before I headed out to the plane… I’m sure a lot of what I’m asking is answered in there.. I was planning on buying them once I started re-building

Once the wings are out… a wood spar blank is put in and some/all of the wing bolts put back in?

If the spars are not in, are the main gear not supported enough…is it safe to move it around on the gear with no wing bolts in?


Thanks
 
I’m now realizing I should have bought the plans/instructions before I headed out to the plane… I’m sure a lot of what I’m asking is answered in there.. I was planning on buying them once I started re-building

If you have the serial number, you can register it under your online VansAircraft.com store account, and have access to all the plans and instructions there, for free.
 
With a lot of advice I got from on here I got the wing bolts loosened/removed … with not too much trouble… big thanks to everyone who posted in this thread
 
Last edited:
Back
Top