ronschreck
Well Known Member
Awhile back I took my RV-8 in for the bi-annual pitot/static and transponder check. My Garmin 327 transponder checked out perfectly. (The avionics technician said he NEVER sees problems with Garmin transponders.) The static system test was another story: The test equipment (vacuum line) is attached to one of the static ports via a rubber cup that fits around the static port on one side of the aircraft and is held in place by a tripod with suction feet that stick to the side of the airplane around the static port. The port on the opposite side of the tail is covered with a piece of electrical tape to seal it shut. Several tests are done to check the accuracy of your altimeter and I won?t go into that, but a leaky static system will spell FAIL right away. For the leak test the altimeter is taken up to 1000 feet above the ambient pressure altitude and a valve is closed at that point to isolate the static system from the pump. The altimeter must not lose more than 100 feet in one minute. Well, mine went down like a two-bit streetwalker on Friday night! FAIL! I didn?t have time to chase down the leak right then and the tech was nice enough to only charge me for a transponder check. My bird was not legal to fly IFR until I got the leak stopped and a valid test completed.
Today I borrowed a vacuum pump from a buddy, put a high-tech needle valve (Wal-Mart aircraft aisle, fish tank supplies) in the vacuum line and attached the line to the static port with some sticky tape that is used to seal vacuum bags. The cobbled together test equipment worked great and the static leak was evident as I brought the altimeter up 1000 feet then closed the needle valve. The altitude dropped like that same skanky chick, again!
Now I won?t bore you with all that ensued for the next five hours as I disconnected every joint in the system to isolate the leak, starting at the panel and working my way back to the static ports. Suffice to say that I removed a lot of interior panels and instruments and said a lot of words that my grandchildren are quite sure I don?t even know! Remember that I started at the panel and ended at the static ports. You know where I found the leak, don?t you? Right, the static ports themselves. And I?m writing this after-action report because I?ll bet a lot of you will have the same problem or have already been there.
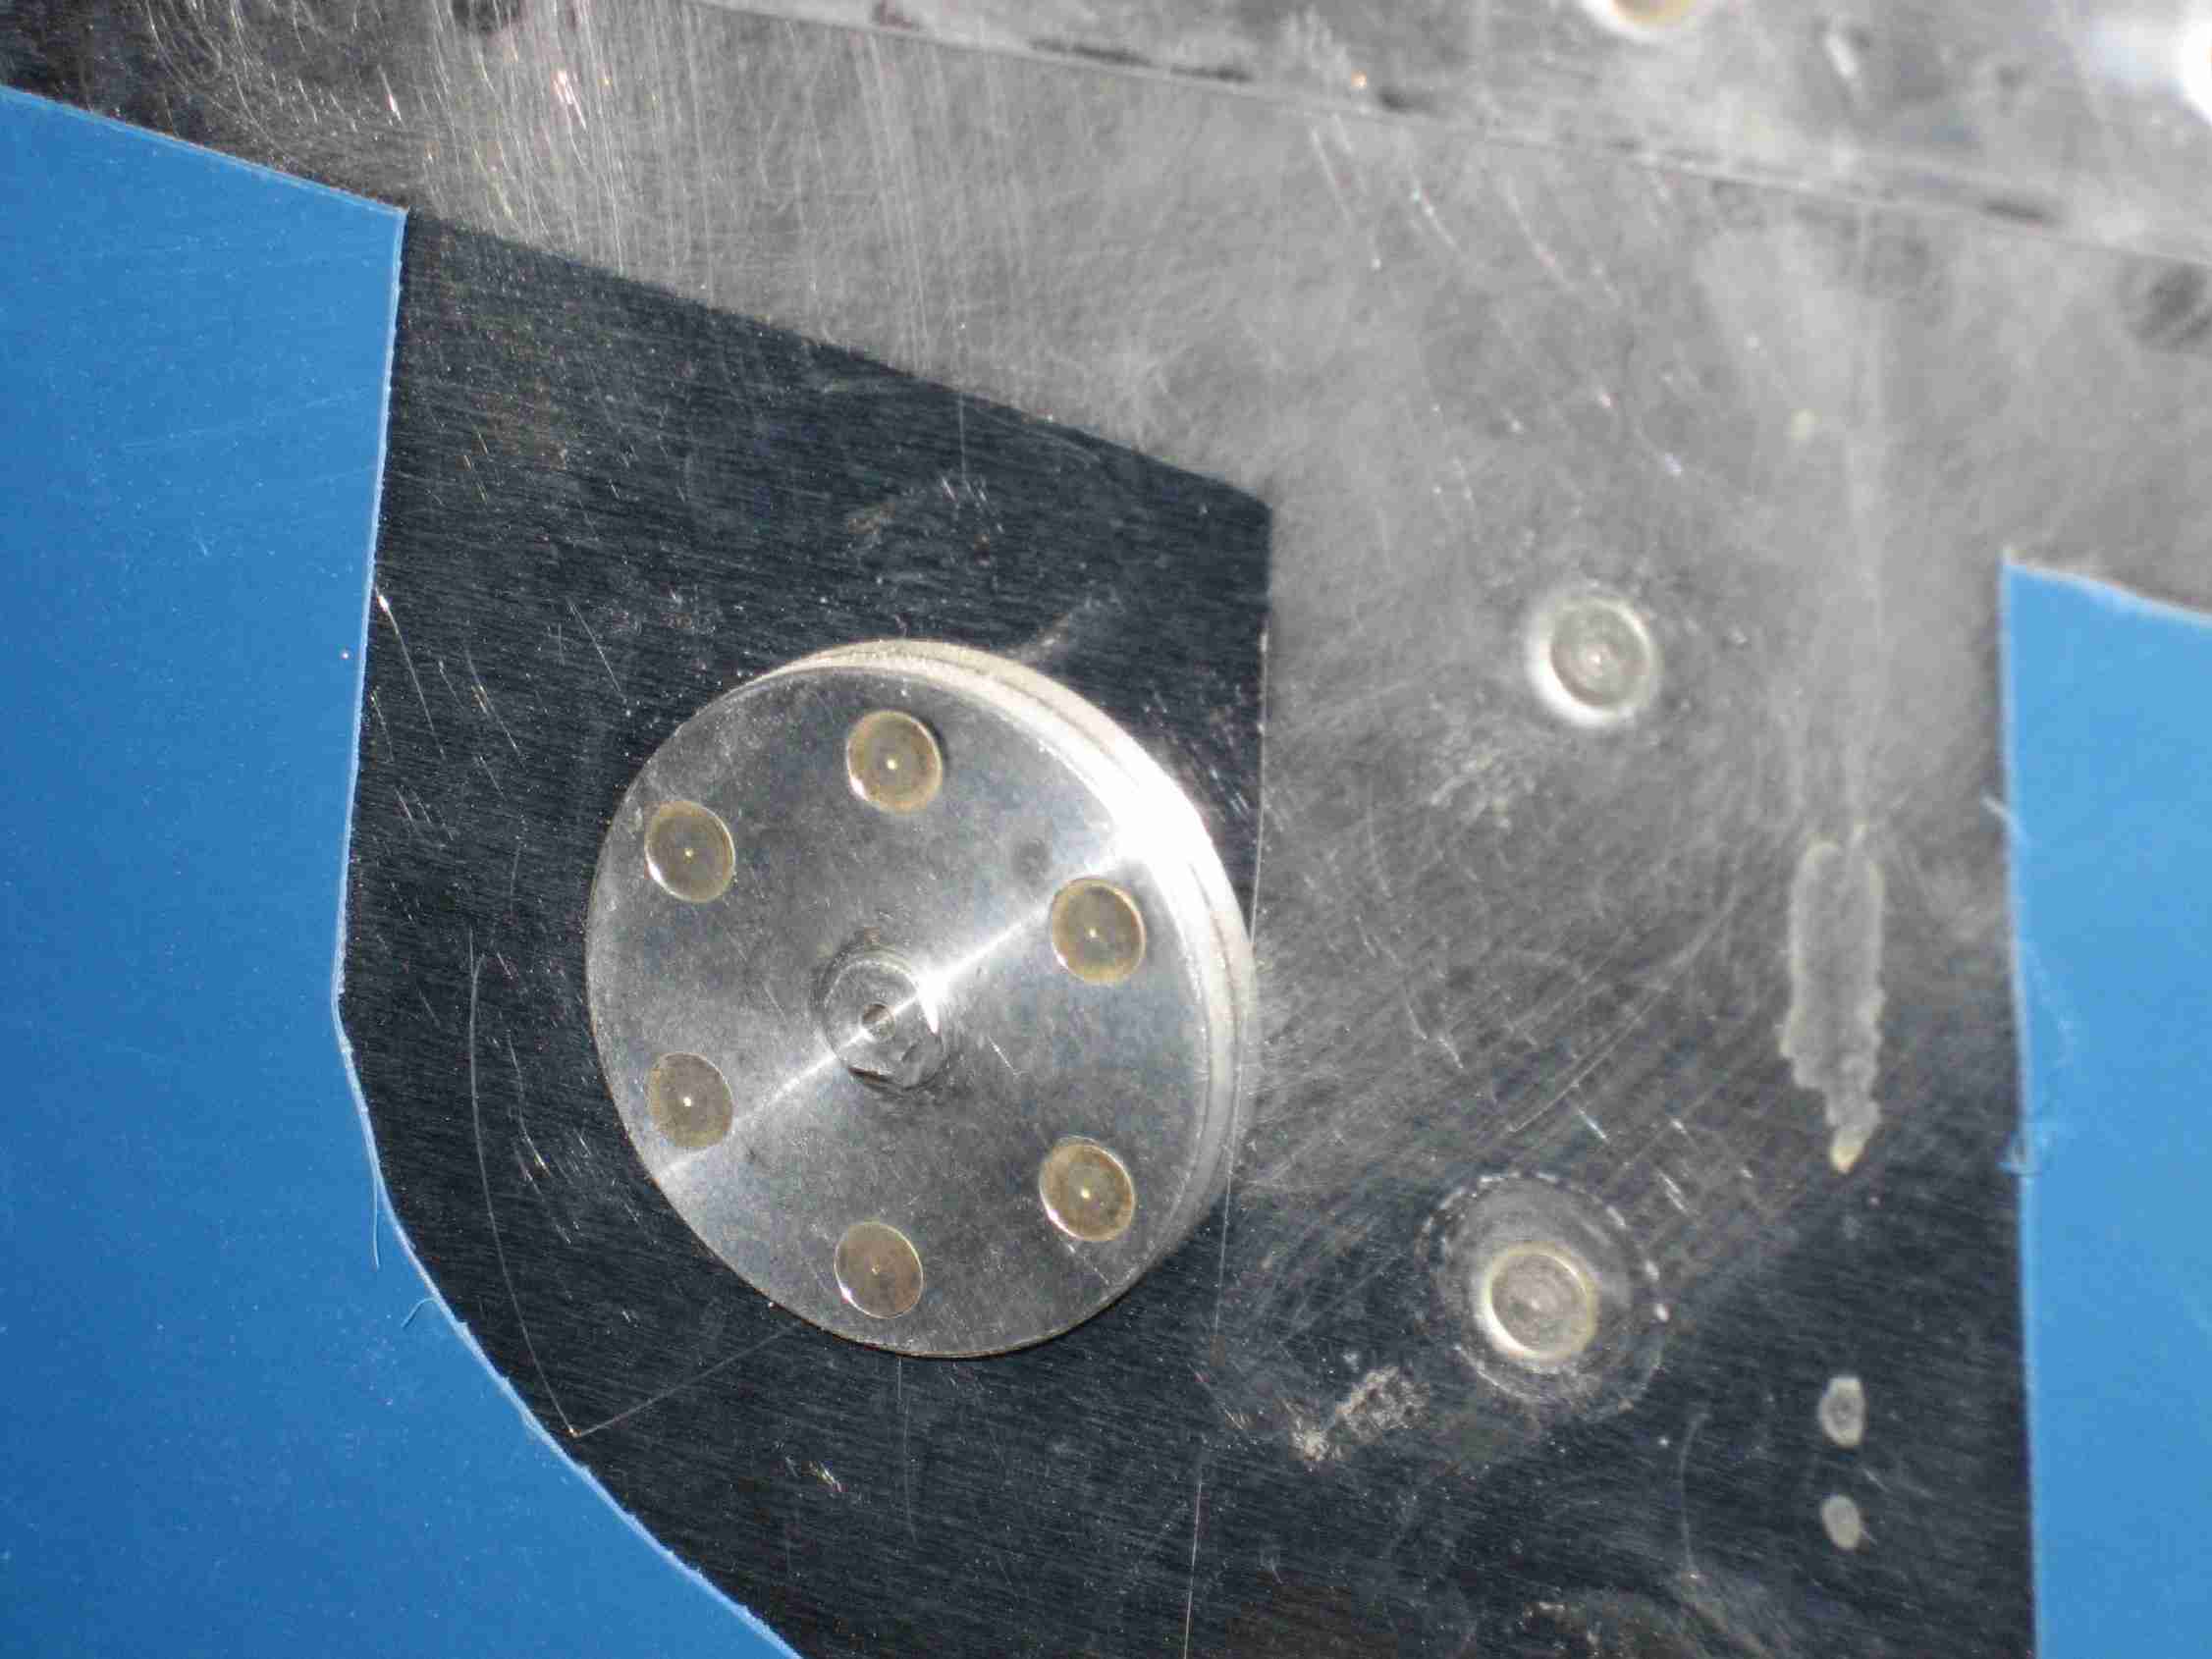
I used Van?s pop rivet static ports. They are simple, work great and last a long time. However, the leak in my static system was actually not in the system at all. The vacuum line from the test equipment is attached with a rubber cup that covers the entire pop rivet static port. Turns out that the air was leaking AROUND the pop rivet. To fix the problem I cut a tiny hole in a piece of electrical tape and placed it over the hole in the center of the static port rivet. The rest of the tape sealed the area around the periphery of the rivet. If I was just installing the static system I think I would seal the rivet with a glob of proseal or something similar.
If this helps just one of you, I hope you will let me know. I?d hate to think I blew an entire afternoon just for my benefit.
Today I borrowed a vacuum pump from a buddy, put a high-tech needle valve (Wal-Mart aircraft aisle, fish tank supplies) in the vacuum line and attached the line to the static port with some sticky tape that is used to seal vacuum bags. The cobbled together test equipment worked great and the static leak was evident as I brought the altimeter up 1000 feet then closed the needle valve. The altitude dropped like that same skanky chick, again!
Now I won?t bore you with all that ensued for the next five hours as I disconnected every joint in the system to isolate the leak, starting at the panel and working my way back to the static ports. Suffice to say that I removed a lot of interior panels and instruments and said a lot of words that my grandchildren are quite sure I don?t even know! Remember that I started at the panel and ended at the static ports. You know where I found the leak, don?t you? Right, the static ports themselves. And I?m writing this after-action report because I?ll bet a lot of you will have the same problem or have already been there.
I used Van?s pop rivet static ports. They are simple, work great and last a long time. However, the leak in my static system was actually not in the system at all. The vacuum line from the test equipment is attached with a rubber cup that covers the entire pop rivet static port. Turns out that the air was leaking AROUND the pop rivet. To fix the problem I cut a tiny hole in a piece of electrical tape and placed it over the hole in the center of the static port rivet. The rest of the tape sealed the area around the periphery of the rivet. If I was just installing the static system I think I would seal the rivet with a glob of proseal or something similar.
If this helps just one of you, I hope you will let me know. I?d hate to think I blew an entire afternoon just for my benefit.
 YMMV but I've never understood this. Go with real ports, they're important.