What's new
Van's Air Force

Don't miss anything! Register now for full access to the definitive RV support community.

Empennage fairing and access cover

Wunderon

Well Known Member
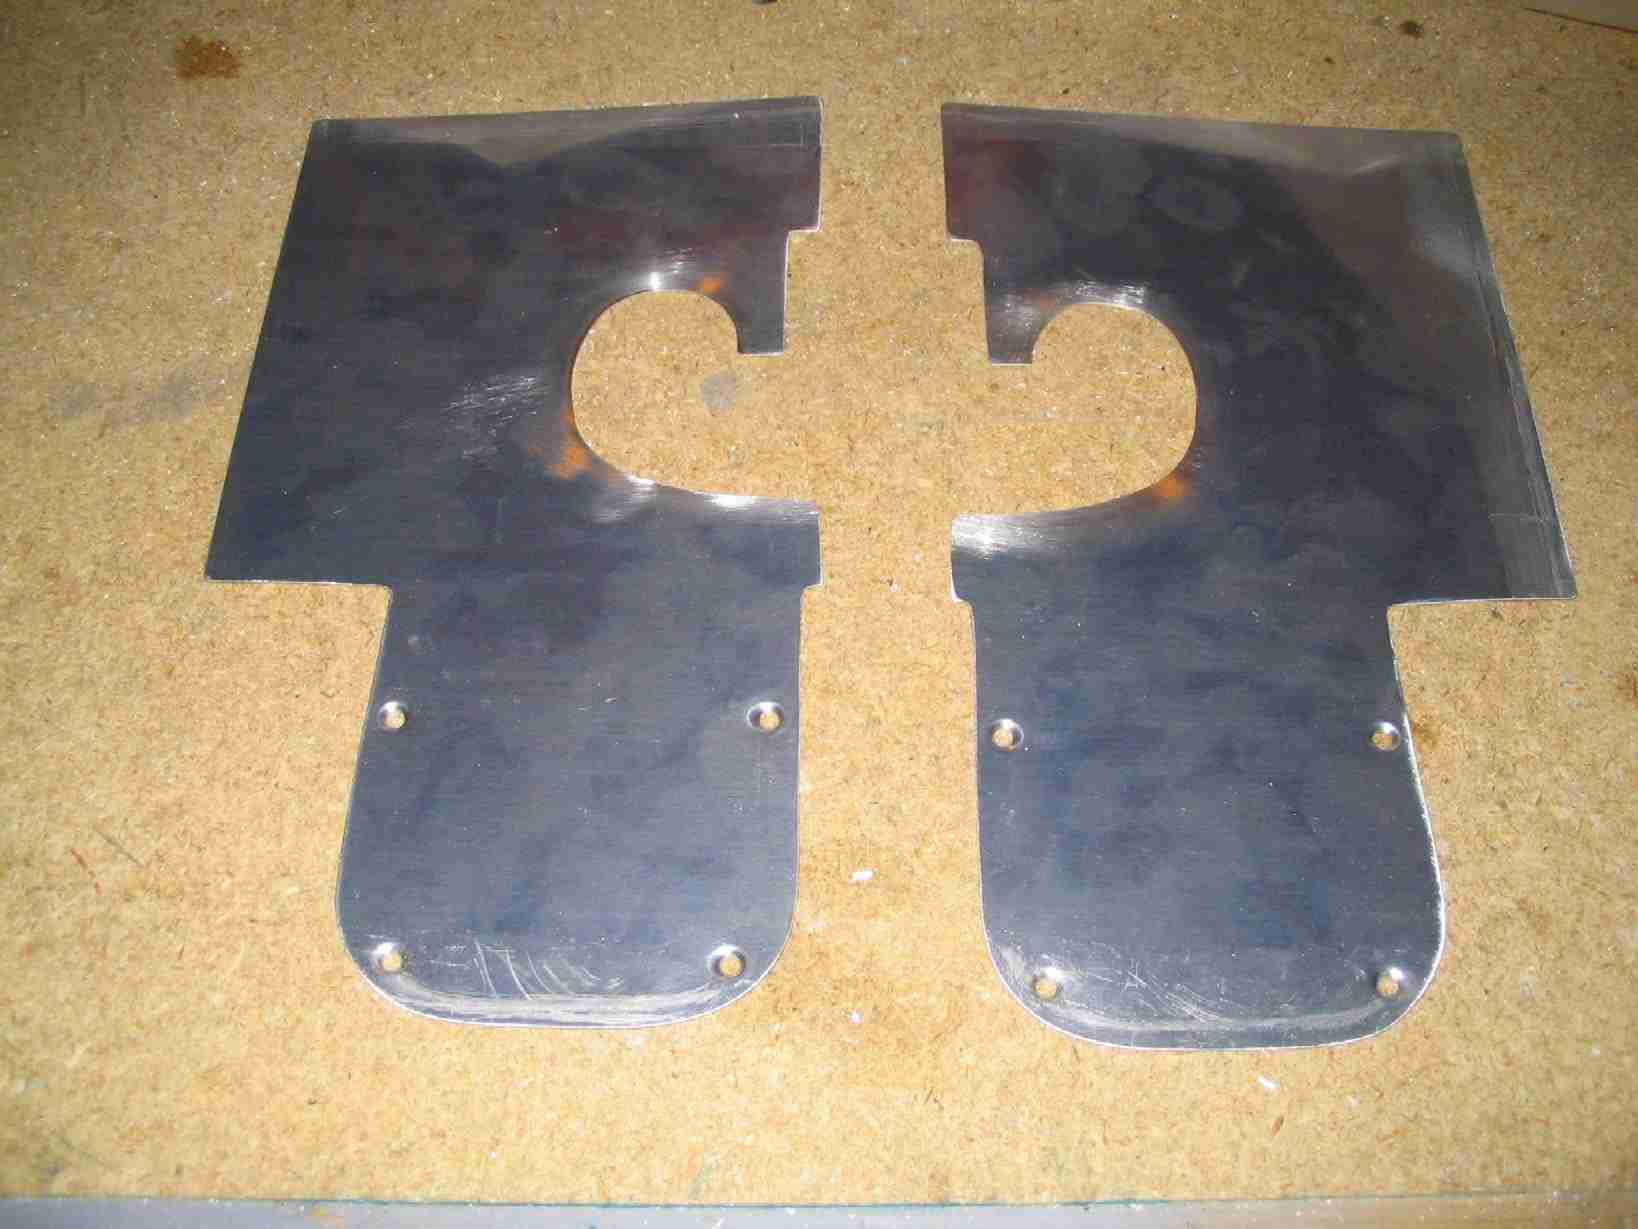
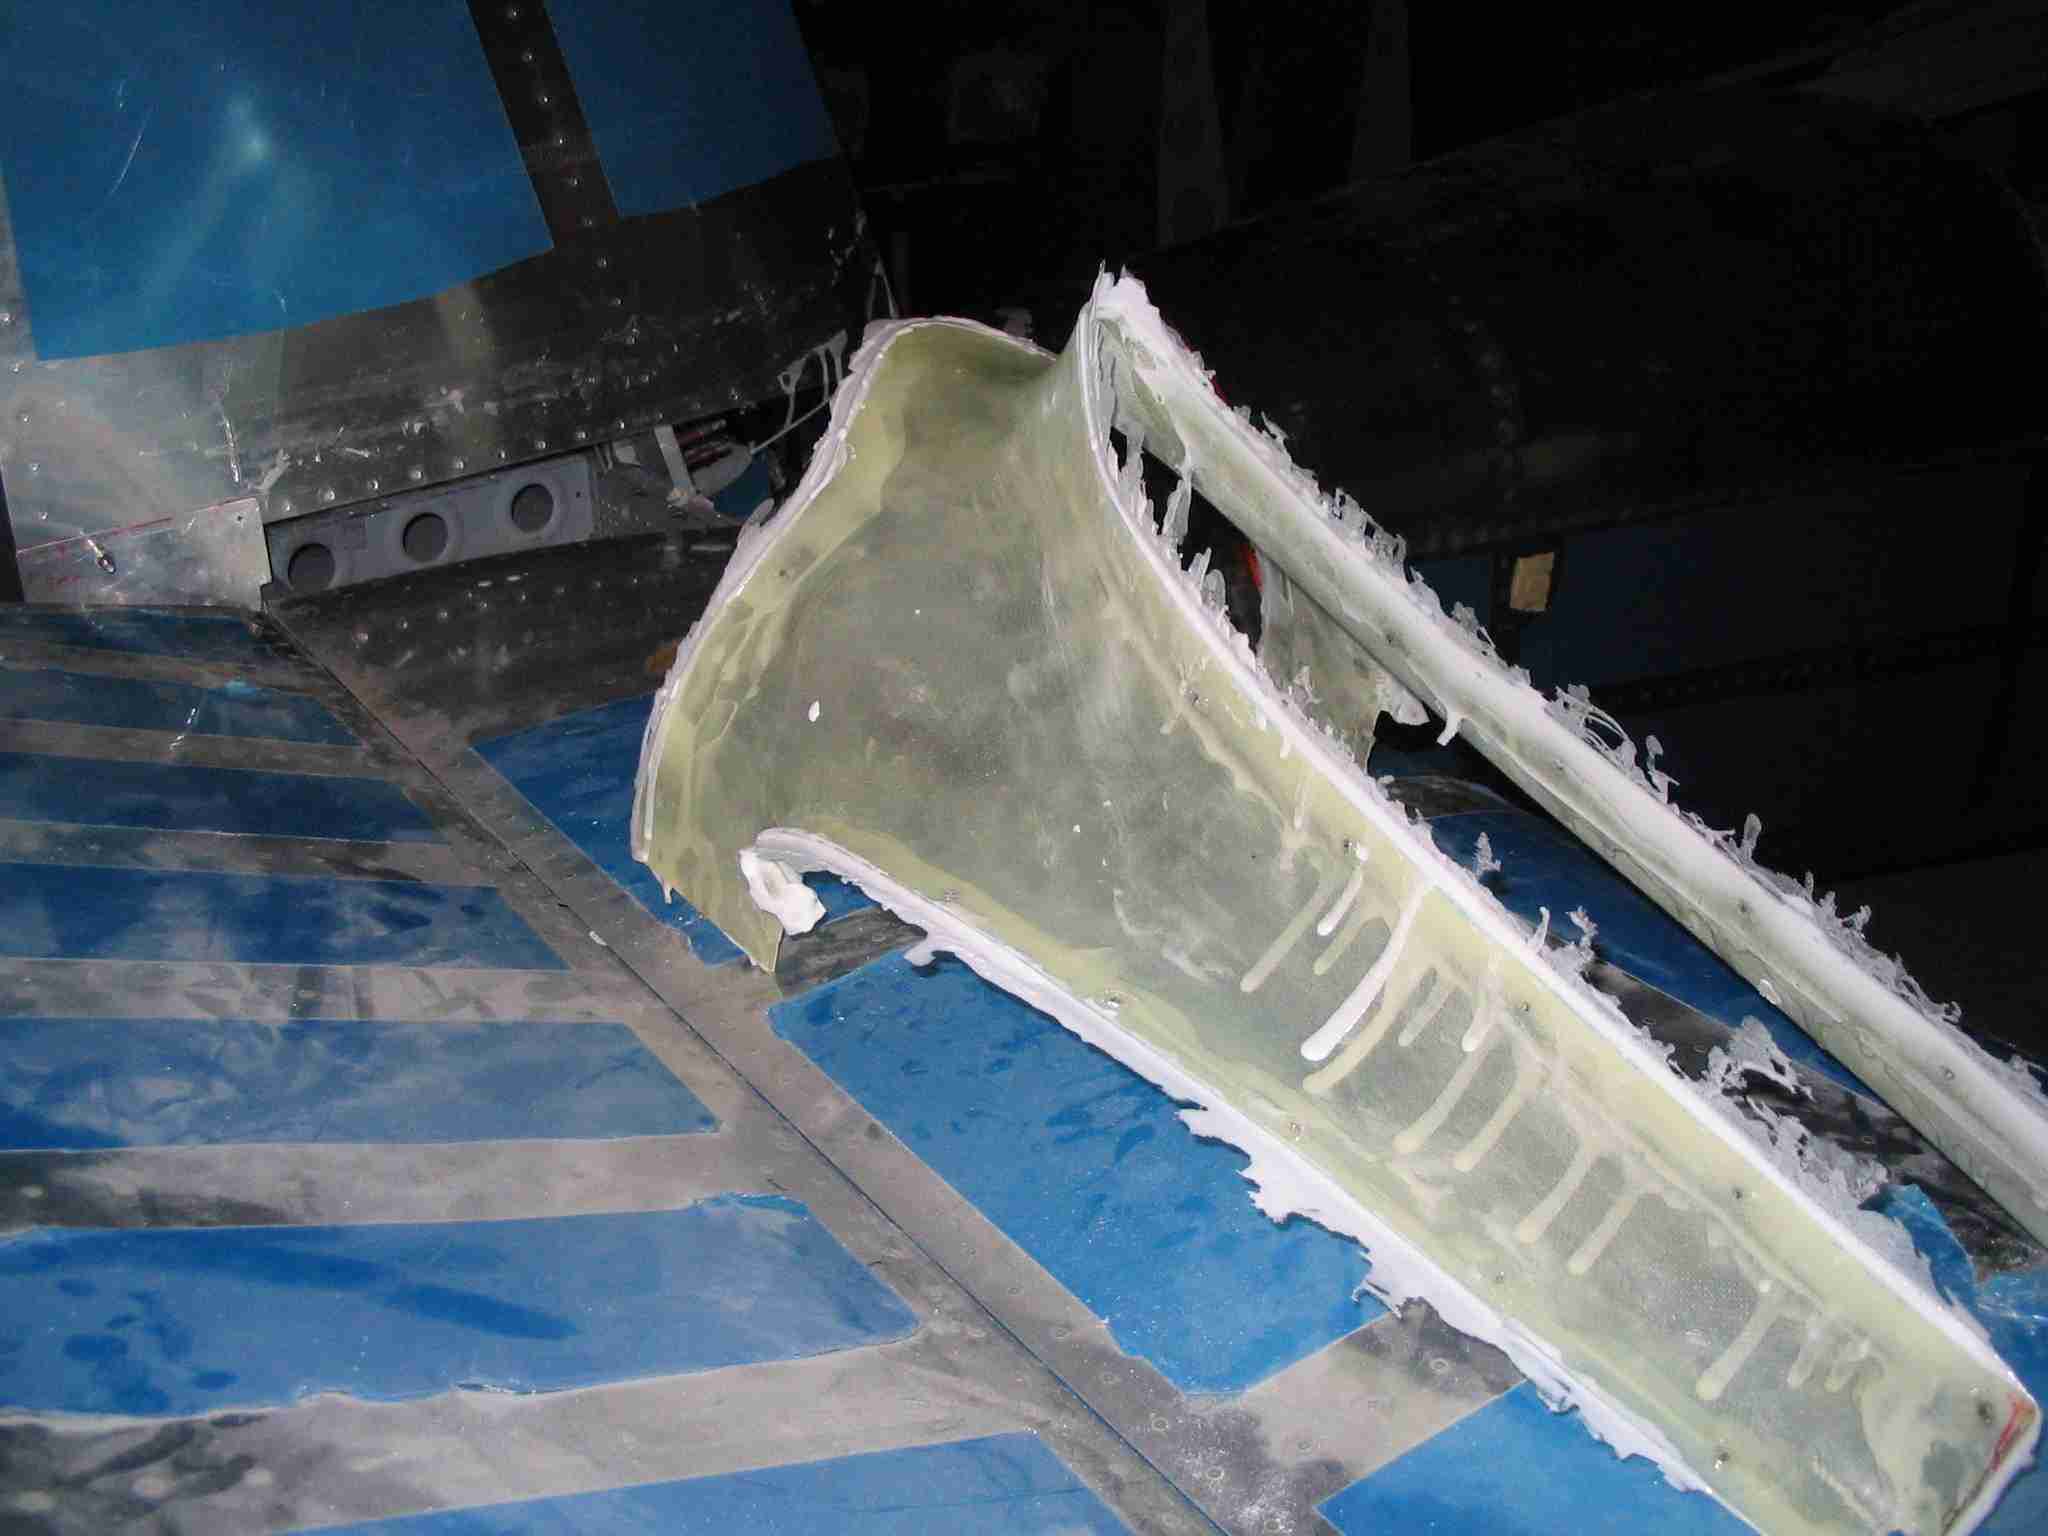
On the empennage fairing and was going to either pop the bottom or drill/tap per plans

Per the plan drawing it appears that the aft inspection covers fit under both the lower and upper empennage fairings and has four screws across the top into the longeron.

What have folks done with the covers here?

Per plans seems that the cover would need to be countersunk where it is under the lower dimpled fairing and drilled to #27 where it underlies the fiberglass upper fairing.

Seems messy and if the lower fairing is popped or glued the cover can't underlie the fairing obviously.
 
I've never heard of or seen "pop and glued" empennagge fairing or bottom HS intersection fairing.

Screws and nutplates are pretty easy and you will be taking this fairing off from time to time. On the bottom I did nutplates instead of tapping the longeron.

Carl
 
I've never heard of or seen "pop and glued" empennagge fairing or bottom HS intersection fairing.

Screws and nutplates are pretty easy and you will be taking this fairing off from time to time. On the bottom I did nutplates instead of tapping the longeron.

Carl

You can rivet (pop or solid) the ones that go under the horizontal stab. There is no (?) reason for them to ever be removed. That's how mine have been for 15+ years...
 
You can rivet (pop or solid) the ones that go under the horizontal stab. There is no (?) reason for them to ever be removed. That's how mine have been for 15+ years...

I tend to paint after the 40 hour test period is done. One thing that comes up is adding a shim to the forward HS spar to change the angle of incidence. For both being able to remove the fairing is handy.

Carl
 
Really asking about the cover here, as it appears to slip up under the fairings on the plans.

Everyone has four screws across the top of the cover into the longeron?

uBNSeykAGQeK138a28lrnfX1BwtoaioNOO78fNaJv3TzcUDuECBQwgQnVxeXnsDBed2IKg_U36JjBvjQAMGg5KCusbkOaSDmwd9B3YBHE2hUuIRJY47ZDXei4_dNU2eqysYKlVf2B6UVX0LDBNPTHrfFsuIGU5kUX1VhhX8PK_pONgi1TC-z4MUoNpbMA8oNd_agmM1o5EGfOKGFTB1P_eHNfi8NnW0r9iAPbWsV7Mb--_40ntVL0SUksyhPKl5h-zG3GkhRztHJTTYxIMDuATDxdFV6Jr2d11Hcr1IbI357eylXdjMsiUaPGWf32OPO6umu8r27cLYZKVaGpkIx8udbKokh0yjRTz64vSsqMhX385Hy4KzBlCDF9W_uOhH8df5oOIVX1Xtc4irkm50X0Ne528N1EOu696IlAJ_L56CeH-pWyE867tzyRLcnaRc-xggS4O5lz_2zHQ7DerEH1bDF7pUdW0z97jnAEOMTdbAh8IhSTABlbp3AyNLhMebYxF9sax9968kqhb7rPPps1BJZBLHjwALId38CQulNatEfDbNtPnmW9oG7-3blx-nHFlEtXJwAPshDwDYVQ8HolaSQrDhaZnlvgK3QZjVm800nOzEw=w545-h420-no


RV8 Plans
 
Last edited:
You can rivet (pop or solid) the ones that go under the horizontal stab. There is no (?) reason for them to ever be removed. That's how mine have been for 15+ years...

Done the same thing 19+ years ago.

I tend to paint after the 40 hour test period is done. One thing that comes up is adding a shim to the forward HS spar to change the angle of incidence. For both being able to remove the fairing is handy.

Carl

Should be set final before Phase I is over. Not a big deal if it needs changed to drill the bottom pop rivets out and make a new piece to close the gap under the HS.

Really asking about the cover here, as it appears to slip up under the fairings on the plans.

Everyone has four screws across the top of the cover into the longeron?

uBNSeykAGQeK138a28lrnfX1BwtoaioNOO78fNaJv3TzcUDuECBQwgQnVxeXnsDBed2IKg_U36JjBvjQAMGg5KCusbkOaSDmwd9B3YBHE2hUuIRJY47ZDXei4_dNU2eqysYKlVf2B6UVX0LDBNPTHrfFsuIGU5kUX1VhhX8PK_pONgi1TC-z4MUoNpbMA8oNd_agmM1o5EGfOKGFTB1P_eHNfi8NnW0r9iAPbWsV7Mb--_40ntVL0SUksyhPKl5h-zG3GkhRztHJTTYxIMDuATDxdFV6Jr2d11Hcr1IbI357eylXdjMsiUaPGWf32OPO6umu8r27cLYZKVaGpkIx8udbKokh0yjRTz64vSsqMhX385Hy4KzBlCDF9W_uOhH8df5oOIVX1Xtc4irkm50X0Ne528N1EOu696IlAJ_L56CeH-pWyE867tzyRLcnaRc-xggS4O5lz_2zHQ7DerEH1bDF7pUdW0z97jnAEOMTdbAh8IhSTABlbp3AyNLhMebYxF9sax9968kqhb7rPPps1BJZBLHjwALId38CQulNatEfDbNtPnmW9oG7-3blx-nHFlEtXJwAPshDwDYVQ8HolaSQrDhaZnlvgK3QZjVm800nOzEw=w545-h420-no


RV8 Plans

I only have TWO (2) screws in both of my rear access covers. Made a custom cover with a Joggle in it on the front and then two screws on the back. Also I modified the fiberglass that comes down behind the top fairing to make it easier to come off and go on. There are ONLY four (4) screws that hold the top fiberglass to my airplane. Used the "Gil Alexander" method on the custom made empennage fiberglass fairing. [Gil Alexander method fiberglass empennage fairing is made by making a satin weave layup over the supplied fairing. Once cured, it is put on the airplane with double sided sticky tape and a custom fairing made on the airplane. Once cured on the airplane, it is removed and finished to be a perfect fit with two (2) screws in the front and two (2) screws in the back. Was taught that by Gil over 20-years ago.)
 
I tend to paint after the 40 hour test period is done. One thing that comes up is adding a shim to the forward HS spar to change the angle of incidence. For both being able to remove the fairing is handy.

Carl

You don't have to remove 'em to paint.

And I don't remember the last time I read about someone adjusting the HS angle of incidence. That is so non-PP kit... ;-)
 
I did something different and I believe it is similar to what Van's is now doing with the -14. (I wish I could take credit but I can't, I simply copied someone else's solution.)

I enlarged the inspection panel.


And cut the aft end of the fairing off. This makes removing the fairing so much easier and you don't have to worry about scratching things back there.


http://www.repucci.com/bill/fuselage_pg3.html
 
Back
Top