What's new
Van's Air Force

Don't miss anything! Register now for full access to the definitive RV support community.

Prop vibration solved.

So just out of curiosity I contacted Les Dowd at Hartzell which is my go-to guy for propeller technical stuff. Les reviewed this thread and had the following comments. Copied and pasted with his permission:

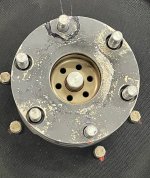
"I read the thread and want to point out a few things.* 1.* The propeller that was out of static balance is shown in the photos with the spinner aft bulkhead and forward bulkhead installed.* When we do the static balance at the factory, there is no spinner components installed…* 2.* I tend to agree with your comment about balancing equipment and the person using it…* I’ve run into many techs that have minimal amount of understanding of what they’re doing during the dynamic balance.* I’ve done troubleshooting on vibration problems only to discover a tech installed the dynamic balance weights 180 degrees from where they should be…* 3.* Mass can shift slightly with blade angle and after break-in.* A dynamic balance solution at 2400 on the ground at zero airspeed can shift when inflight at 150 kts (mass shifts with blade angle increase).* This can be especially true with composite blades because the “vertical balance” of the blade can be dramatically different at low blade angle vs. high blade angle.

In general, yes, a dynamic balance should account for discrepancies in static balance.* The static balance is done to get you close to the solution.* The dynamic then corrects for the engine-propeller-spinner assembly as a unit and during operation.* The problem with relying on the dynamic balance only is, the solution may require a very large amount of weight, so much so that you would have to “punt” and be forced to do a static balance to get in the ballpark.* In theory, the dynamic is done after all the big components are statically balance already and you are “fine tuning” the solution.

When troubleshooting vibration, I really think you are guessing what the problem is without a spectrum analysis.* When people complain about cabin vibration, I firmly believe the only way to find the source is to have the sensor mounted in the cabin when getting that spectrum

I also wanted to point out that re-indexing a prop is not officially approved, endorsed or encouraged by Hartzell Propeller Inc. *It is one solution to a 1/2 order vibration problem that I’ve found works if all other attempts don’t work. Those that do it are moving into the Experimental category on their own.*"
 
Last edited:
Here's my non builder, non mechanic solution that happened to me about 10 years ago. My first RV 8 had an Lycoming O-320/hartzell prop. Had a vibration. Prop balancing didn't do any good. My mechanic was scratching his head, and if memory serves, found the word experimental on the back of the flywheel. (might have been a different word, I can't remember anymore.) Anyway, he temporarily put someone else's flywheel on mine, and said go try it out. "That" was the problem. New flywheel installed.:)
 
Last edited:
I understand his comment about not re-indexing the prop meaning pressing out or changing the bushing locations. But my prop and seems like others don't come with instructions on how to index it to begin with. For example, my prop can be bolted on two ways, each 180* from the other. Nothing says put blade 1 at TDC, etc. So I can't see how it could be wrong to turn it on the flange 180* if you don't know which way it's supposed to go anyway!

I reclocked mine last night and have it retorqued. I'll do another dynamic balance Saturday before flying.

This is experimental aviation!

I agree about indexing the prop, a friend of mine is a IA, he said it didn't matter which way I put the prop on, if I had a vibration I shouldn't get rid of I would also recheck mine 180. When you do a dynamic balance is it done at 2700 rpm? I've heard of people doing them at 2500 rpm.


Both of you guys are missing a detail here.

The discussion is around moving the prop one set of bolt holes, not 180?. In order to re-clock the prop one set of holes, the bushings need to be pressed out and moved on the crank flange.
 
Which I just did - and I'll let you know next year how it works! Decided to get out ahead of the reported vibration issues and move the lugs while building. Wasn't easy using C-clamp but got it accomplished.

I figure if SacSkyRanch has no issues with it, neither do I. A prop is always going to be in line with the crank throws on a pair of cylinders on the 540, it's just a question of which pair, right?
 
Decided to get out ahead of the reported vibration issues and move the lugs while building.

Though the question was asked several times, I didn't see a definitive answer... should a builder reclock the prop while building like Bill did? I'll be installing mine after 1st of the year and would like to know if re-clocking by one hole up front has the potential to induce a problem as well. Should one wait on fixing a problem ONLY if the problem exists, or is being proactive and doing this during the build advisable since so many people have had the same experience?
 
Though the question was asked several times, I didn't see a definitive answer... should a builder reclock the prop while building like Bill did? I'll be installing mine after 1st of the year and would like to know if re-clocking by one hole up front has the potential to induce a problem as well. Should one wait on fixing a problem ONLY if the problem exists, or is being proactive and doing this during the build advisable since so many people have had the same experience?


If I had the option, I would have gotten ahead of it. I'm going to do it next time I pull the prop.


My only question is.. how? On an installed engine. Who rents the tool to press the bushings out and back in? I remember hearing there was a specialized tool. Do I need to replace the bushings? If so, where do I order them from?
 
Last edited:
Which I just did - and I'll let you know next year how it works! Decided to get out ahead of the reported vibration issues and move the lugs while building. Wasn't easy using C-clamp but got it accomplished.

I figure if SacSkyRanch has no issues with it, neither do I. A prop is always going to be in line with the crank throws on a pair of cylinders on the 540, it's just a question of which pair, right?

Though the question was asked several times, I didn't see a definitive answer... should a builder reclock the prop while building like Bill did? I'll be installing mine after 1st of the year and would like to know if re-clocking by one hole up front has the potential to induce a problem as well. Should one wait on fixing a problem ONLY if the problem exists, or is being proactive and doing this during the build advisable since so many people have had the same experience?

If I had the option, I would have gotten ahead of it. I'm going to do it next time I pull the prop.

I don't get it, why would you try to 'fix' something that isn't broke?

I'm pretty sure Sacskyranch hasn't done any real vibration or harmonic testing and there opinion is based on theory, so I would not consider them an authority on propellers.

Hartzell which is likely the most knowledgeable source of information when it comes to prop testing in the world, made the following statement, you can choose to ignore it if you wish, but be aware that ignoring proven test results and instead going with suggestions you heard on the internet has risks.

" I also wanted to point out that re-indexing a prop is not officially approved, endorsed or encouraged by Hartzell Propeller Inc. *It is one solution to a 1/2 order vibration problem that I’ve found works if all other attempts don’t work. Those that do it are moving into the Experimental category on their own.*"
 
Last edited:
Update on my prop, I clocked it 180* and re-balanced it to .03 IPS at 2450 RPM again. Starting off the balancing, I was at .2 IPS instead of .6. It only took 17 grams vs over 60 for it to balance out. It's at .01 at idle RPMs now. Flying it has made a noticeable difference. While I still feel a bit of a rumble in the seat, the air frame itself is much smoother and more stable. The tips don't bounce anymore! Oddly, the biggest difference has been the noise level. There was a huge drop in resonance noise in the cabin and it's very welcomed!

I'd definitely recommend clocking as allowed if folks are having issues that a dynamic balance doesn't solve.
 
Though the question was asked several times, I didn't see a definitive answer... should a builder reclock the prop while building like Bill did? I'll be installing mine after 1st of the year and would like to know if re-clocking by one hole up front has the potential to induce a problem as well. Should one wait on fixing a problem ONLY if the problem exists, or is being proactive and doing this during the build advisable since so many people have had the same experience?

I did it when I had the crank on the bench during my overhaul. More than enough positive reports and none negative. The fact that this all started on the advice of a Hartzell tech, made me comfortable that it was the right call. It is unclear if some are vibration free in the stock configuration, as it is based upon personal feel and apparently the vibration is not significant or highly noticeable.

Larry
 
Last edited:
Well, update on my post, the vibration hasn't been eliminated. I'm going to spend some time looking for obvious and less than obvious interference with cowl, etc. But I'm leaning back towards a prop issue.
 
This Works!

Airplane has about 70 hours on it now. Been flying well, but I felt it "vibrated" too much. (was not as smooth as my 4 cyl. Mooney) Had my prop dynamically balanced. Made little to no difference.

Yesterday, I reclocked the prop to horizontal with #1 at TDC. IT WORKED! Test flight afterwards confirmed that vibration was gone. Now it feels like a plane should! Thank you to all that posted this fix. It's a game changer.

One note of caution to others who attempt this procedure, be SURE to read the Lycoming Service Instructions.
https://www.lycoming.com/sites/default/files/SI1098Q%20Propeller%20Flange%20Bushing%20Location.pdf

I did not read this carefully and pressed out the wrong bushings. After reading others posts on how to do it, it seemed really straight forward. Swap two bushings (a long one with a short one) to give the proper clocking. HOWEVER, one of the shorter bushings is the index bushing and has a larger diameter. It won't fit in any other hole. You have to swap the non-index short bushing, otherwise, they won't fit.

Other than that, super easy. Tapped old bushing out with hammer and soft drift. Pulled bushings back in using 1/2 bolt and sockets. I did not use new bushings, and they pressed in just fine (very tight fit). No need to get new ones.

I'm about to try this procedure with the D4A5/Hartzell BA prop on my Rocket. I've always had what feels like a 1/2 order vibration at 2400 and below. I feel it's worthwhile trying as I can always revert back to the old clocking if it ends up not helping.
 
This thread is great! I'm running an IO-320 B1A with a Hartzell HC-C2YL-1BF and have been bothered by vibration despite multiple attempts at balancing. I have the prop at 0.07 IPS with a 1/2-per vibration of 0.75. It's enough to be annoying in flight. The run was done at 2300 RPM. I've replaced Lord mounts, re-oriented my exhaust hangars as there was a little too much flex in them and gone over, with a second set of eyes, the airframe and cannot find anything else to do. I even tried flipping the prop 180* with no significant improvement. I am going to try re-clocking as this thread describes and would appreciate the chance to speak with anyone who has completed this to make sure I do this correctly. I have Lycoming SI 1098Q that gives the orientation of the flange bushings on my type 2 flange. Does anyone have a drawing of the FINAL bushing orientation with the prop at 9/3 that they would be willing to share? Some folks said they ordered new bushings and others just re-positioned the existing ones. Is there a need to buy another of a specific bushing? My indexed bushing is 72065. There are 2- 72064 and 3-72063 based on the literature.
Thanks
David
 

Attachments

  • Jan23dynaVibeRun (1).pdf
    203.3 KB · Views: 130
Airplane has about 70 hours on it now. Been flying well, but I felt it "vibrated" too much. (was not as smooth as my 4 cyl. Mooney) Had my prop dynamically balanced. Made little to no difference.

Yesterday, I reclocked the prop to horizontal with #1 at TDC. IT WORKED! Test flight afterwards confirmed that vibration was gone. Now it feels like a plane should! Thank you to all that posted this fix. It's a game changer.

One note of caution to others who attempt this procedure, be SURE to read the Lycoming Service Instructions.
https://www.lycoming.com/sites/default/files/SI1098Q%20Propeller%20Flange%20Bushing%20Location.pdf

I did not read this carefully and pressed out the wrong bushings. After reading others posts on how to do it, it seemed really straight forward. Swap two bushings (a long one with a short one) to give the proper clocking. HOWEVER, one of the shorter bushings is the index bushing and has a larger diameter. It won't fit in any other hole. You have to swap the non-index short bushing, otherwise, they won't fit.

Other than that, super easy. Tapped old bushing out with hammer and soft drift. Pulled bushings back in using 1/2 bolt and sockets. I did not use new bushings, and they pressed in just fine (very tight fit). No need to get new ones.


I just did this exact thing on a friends RV10. Super smooth now. Before it would rattle your teeth.
 
WHY ? I have not seen this thread earlier :confused:

So glad I found this information. Thank you to all posters here ;)
I fly my 10 behind IO-540 and two blade Hartzell metal prop and I have these annoying vibration since day 1. Did my dynamic balancing - still no improvement.
I now plan to re-clock my prop to 3-9 position at TDC and will report on the next opportunity.

Pay special attention to post above. One of the bushings you will be swapping is an index bushing and has special part numbers, as the base is either 20 or 40 thou larger than all the others. FYI, I needed a new index bushing and a short bushing. I just took the un needed long bushing to the lathe and made it a short bushing.:D if you have machine tools, this saves $50. They are NOT hardened. Just be sure to put a chamfer on it.
 
Last edited:
Pay special attention to post above. One of the bushings you will be swapping is an index bushing and has special part numbers, as the base is either 20 or 40 thou larger than all the others. FYI, I needed a new index bushing and a short bushing. I just took the un needed long bushing to the lathe and made it a short bushing.:D if you have machine tools, this saves $50. They are NOT hardened. Just be sure to put a chamfer on it.

Thank you Larry. I will “measure twice cut once” before proceeding.
Hope this will solve my issue with vibration and will definitely share the results here.
 
Thank you Vlad. I’ll also be looking for your results here, as I’ve chased balance with the DynaVibe (3 times), and the Balance Masters ring, and still looking for the right formula.
 
Reclocking a prop 180 degrees

Recently I re-installed (Same clocking as before) my WW prop (Lost a shim and WW Ohio employee resealed it) and after firing it up felt the same as when it was new. Three blade composite props in my opinion almost always "feel" better than metal 2 blade so felt back to at least original install. Checked tracking and within spec but only by 3/64th of an inch. (Limit 16/64ths). Decided to remove and re-clock it 180 degrees (And while it was off install a new alternator belt) I didn't tap out a lug, gather a new tool just rotated it 180 degrees as I had the option of doing originally. I figured it would get worse, better or stay the same and give the Dynavibe an easier task. If it was worse, I would remove and reinstall back to original but figured I has a 2/3rds chance I would not need to remove and reinstall. Tracking after reclock improved 5/64ths and ground runup did indeed feel better. Test flight also "felt" better, so I was able to leave it on and now in a few weeks will get it rebalanced. I've only helped in a few other prop installs but have always had the option of installing a prop 2 ways, (180 degrees apart) and each one would be ok. Not sure what is the issue with special tools and parts needed but again my experience is limited. Seems an easy way to ensure that a prop is at least in the "better" orientation. (Remove and rotate 180 degrees)

BTW theirs an app called Vibrometer if you want to get a ball park number in cruise. Not quite the accuracy of DynaVibe but better than resting your hand on the dash.
 

Attachments

  • Screenshot 2023-12-31 185206.jpg
    Screenshot 2023-12-31 185206.jpg
    184.9 KB · Views: 61
  • Screenshot 2023-12-31 185126.jpg
    Screenshot 2023-12-31 185126.jpg
    133 KB · Views: 62
Last edited:
Does re-clocking apply for fix pitch also? I had a 6A with a metal prop and it ran smooth. I currently have an RV3 with a carbon wrapped wood prop and had it balanced in flight because the static rpm was around 2050 for the Prince prop 68x79. Yes I know static rpm should be around 2200. Originally I had the same prop but with 3” less pitch with a static rpm close to 2200 but the wot rpm at 6500’ was 2830 rpm. The seller had ordered the prop I have now which was delivered an over year after I bought the plane. I’m 10 kts faster with a wot rpm of 2700 or so.

Anyways I actually flew the plane with the Dynavibe attached and balanced it at 2450 rpm. I took readings at 500, 750, 900, 1000, 1100 . . . 2600. I took readings on the ground up to 2000 rpm and the rest in flight. The ips were between.03 - .05 from 550 - 1300 rpm. At 1400 it was .14. At 1500 it was .04, 1600 (.06), 1700 - 1800 (.05), 1900 (.02). 2000-2400 (.01-.02), 2500 (.04). 2600 (.06).

From what I’m told a wood prop doesn’t have the inertia that a metal prop has which is why some of the people who run wood props add weight on front of the prop to make it run smoother. I still feel vibration on the ground especially at around 900 rpm but also in flight at normal cruise unlike in a couple of friend’s plane.

At TDC, does the prop suppose to be at the 3-9 position or the 12-6 position?

Thanks
 
Last edited:
Today I removed my prop to prepare for clocking process.
I found that my prop hub has only one key position (counter bored around bolt). Based on this I feel that I can simply interchange positions of two bushings and get job correctly done.

At this time my prop is set at 1-7 o'clock position while staying in the front of propeller and looking back to airplane. I want to re-clock it to 3-9 o'clock position, which will require me to move prop CW by 60 degrees (one hole) if staying in the front of the prop and looking back to airplane.

By looking at pictures below I plan to remove Short2 and Long4 and exchange their positions. Since my Key bushing is Short1 in the bottom at 7 o'clock and my prop hub has counter bored hole around that bolt anyway so I can safely move that hub position over Long2.
The Long4 and Short2 must have the same diameter so they should be interchangeable.
What I worry about is the little disbalance on my flange.
Assume I exchanged positions of Short2 and Long4 while kept Short1 in its current position I technically change the weights on the flange. Do you think it may cause a noticeable disbalance ?

My other option is to remove (Key1) Short1, replace it with different part number to make it long, then remove Long2 and replace it with again different part number to make it short.

What are your thoughts on this ?
Thank you;)
 

Attachments

  • IMG_1674_sm.jpg
    IMG_1674_sm.jpg
    475.4 KB · Views: 92
  • IMG_1673_sm.jpg
    IMG_1673_sm.jpg
    509.5 KB · Views: 93
Last edited:
Today I removed my prop to prepare for clocking process.
I found that my prop hub has only one key position (counter bored around bolt). Based on this I feel that I can simply interchange positions of two bushings and get job correctly done.

At this time my prop is set at 1-7 o'clock position while staying in the front of propeller and looking back to airplane. I want to re-clock it to 3-9 o'clock position, which will require me to move prop CW by 60 degrees (one hole) if staying in the front of the prop and looking back to airplane.

By looking at pictures below I plan to remove Short2 and Long4 and exchange their positions. Since my Key bushing is Short1 in the bottom at 7 o'clock and my prop hub has counter bored hole around that bolt anyway so I can safely move that hub position over Long2.
The Long4 and Short2 must have the same diameter so they should be interchangeable.
What I worry about is the little disbalance on my flange.
Assume I exchanged positions of Short2 and Long4 while kept Short1 in its current position I technically change the weights on the flange. Do you think it may cause a noticeable disbalance ?

My other option is to remove (Key1) Short1, replace it with different part number to make it long, then remove Long2 and replace it with again different part number to make it short.

What are your thoughts on this ?
Thank you;)

While your hub has 5 counterbores, the std protocol used by the industry is 4 lugs in a rectangular pattern. I am sure there is no issue using 5 instead of 4, however, I am not sure that having 4 lugs in a pattern other than the recommend rectangular pattern is acceptable. While it would seem that any four lugs is fine, I am not an Engineer and accept the fact that many things that seem logically OK to a novice are not necessarily OK on an engineering level. I absolutely would not violate this convention without getting an OK from Lyc or Hartzell. I replaced the short index with a long index lug to keep the rectangle pattern, as I was not qualified to assess whether or not that is required and the docs were quite clear on the rect pattern. This was also the approach outlined by Hartzell on this non-official recommendation.


Larry
 
Last edited:
Just a quick comment for anyone that is scratching their head like I was for a minute. Looking at posts #71 and #73, looking at the pictures of the crankshaft, you can see that even the short bushings extend proud of the face of the crankshaft a little bit. But looking at the pictures of the prop, the locations where the short bushings go have no counterbore at all for the bushing - the face of the prop is flat right to the bolt.

For a minute I was scratching my head wondering how the prop would mate face to face on the crank.

Then I remembered that the ring gear support (flywheel) goes on there too.

Palm slap on forehead.
 
Recently I re-installed (Same clocking as before) my WW prop (Lost a shim and WW Ohio employee resealed it) and after firing it up felt the same as when it was new. Three blade composite props in my opinion almost always "feel" better than metal 2 blade so felt back to at least original install. Checked tracking and within spec but only by 3/64th of an inch. (Limit 16/64ths). Decided to remove and re-clock it 180 degrees (And while it was off install a new alternator belt) I didn't tap out a lug, gather a new tool just rotated it 180 degrees as I had the option of doing originally. I figured it would get worse, better or stay the same and give the Dynavibe an easier task. If it was worse, I would remove and reinstall back to original but figured I has a 2/3rds chance I would not need to remove and reinstall. Tracking after reclock improved 5/64ths and ground runup did indeed feel better. Test flight also "felt" better, so I was able to leave it on and now in a few weeks will get it rebalanced. I've only helped in a few other prop installs but have always had the option of installing a prop 2 ways, (180 degrees apart) and each one would be ok. Not sure what is the issue with special tools and parts needed but again my experience is limited. Seems an easy way to ensure that a prop is at least in the "better" orientation. (Remove and rotate 180 degrees)

BTW theirs an app called Vibrometer if you want to get a ball park number in cruise. Not quite the accuracy of DynaVibe but better than resting your hand on the dash.

Update, rebalanced the prop today (with the prop reclocked 180 degrees) and it took slightly over half the weight that was used before to rebalance.
 
Just a quick comment for anyone that is scratching their head like I was for a minute. Looking at posts #71 and #73, looking at the pictures of the crankshaft, you can see that even the short bushings extend proud of the face of the crankshaft a little bit. But looking at the pictures of the prop, the locations where the short bushings go have no counterbore at all for the bushing - the face of the prop is flat right to the bolt.

For a minute I was scratching my head wondering how the prop would mate face to face on the crank.

Then I remembered that the ring gear support (flywheel) goes on there too.

Palm slap on forehead.

I was wondering the same thing, thinking “I’m too stupid to figure this out”. Thanks for clearing that up. That said, I still don’t understand how I would know which bushings to change in order to set the prop at 9 and 3. I bought the TOOL 00002 from Vans and it came in about 4 days - thank you Vans, glad you’re getting things figured out. Today I tried to reset my Sensenich GA blades using my new tool. It’s nearly impossible to get it perfect. I’m at .1 degree difference, and that may be the best I can do. The blades don’t twist easily. When I get them set to what looks perfect, it changes when I start torquing the clamp bolts. If the blade hubs were smoother, or greased, it would probably be easier to move them where I want - but then I would likely end up with an uncontrollable variable pitch prop.
 
While your hub has 5 counterbores, the std protocol used by the industry is 4 lugs in a rectangular pattern. I am sure there is no issue using 5 instead of 4, however, I am not sure that having 4 lugs in a pattern other than the recommend rectangular pattern is acceptable. While it would seem that any four lugs is fine, I am not an Engineer and accept the fact that many things that seem logically OK to a novice are not necessarily OK on an engineering level. I absolutely would not violate this convention without getting an OK from Lyc or Hartzell. I replaced the short index with a long index lug to keep the rectangle pattern, as I was not qualified to assess whether or not that is required and the docs were quite clear on the rect pattern. This was also the approach outlined by Hartzell on this non-official recommendation.


Larry

Thank you Larry.
I think I will do it properly, I already ordered bushings, so I will just get everything clocked by 60 degrees to ensure that it is match the standard.
Will report when finish.
 
Just a quick comment for anyone that is scratching their head like I was for a minute. Looking at posts #71 and #73, looking at the pictures of the crankshaft, you can see that even the short bushings extend proud of the face of the crankshaft a little bit. But looking at the pictures of the prop, the locations where the short bushings go have no counterbore at all for the bushing - the face of the prop is flat right to the bolt.

For a minute I was scratching my head wondering how the prop would mate face to face on the crank.

Then I remembered that the ring gear support (flywheel) goes on there too.

Palm slap on forehead.

Don't feel bad. I think we all have a bit of scarring on the forehead from such moments:D
 
I was wondering the same thing, thinking “I’m too stupid to figure this out”. Thanks for clearing that up. That said, I still don’t understand how I would know which bushings to change in order to set the prop at 9 and 3. I bought the TOOL 00002 from Vans and it came in about 4 days - thank you Vans, glad you’re getting things figured out. Today I tried to reset my Sensenich GA blades using my new tool. It’s nearly impossible to get it perfect. I’m at .1 degree difference, and that may be the best I can do. The blades don’t twist easily. When I get them set to what looks perfect, it changes when I start torquing the clamp bolts. If the blade hubs were smoother, or greased, it would probably be easier to move them where I want - but then I would likely end up with an uncontrollable variable pitch prop.

take two 4' long 2x4's and clamp them to the blade, like a sandwich. This additional leverage will make it easy to make small adjustments. It will also allow you to more precisely hold the blade as you tighten the clamping bolts.

Larry
 
It took me a while to complete my flight tests with the prop reinstalled rotated 60 degrees CW.
To recall - I had strong vibrations during the flight with my two blade metal Hartzell prop and IO-540 behind from the day one I built my RV10.
My prop was dynamically balanced but even that did not help to solve the issue.

After reading this and few other threads I decided to try to rotate my prop 60 deg CW. I removed my prop, sent it to local shop for visual inspection and reseal (since prop is off the airplane why not to get it inspected just in case).

Prop was returned back to me and reinstalled in 60 degrees CW position comparing to original one. I completed two test flights and was impressed how smooth it is now in the cabin.
Keep in mind that I have not done dynamic balancing yet, still waiting for the guy to become available to help me. Even without balancing all strong vibrations are now gone.
I used to hold my arm on the center vertical bar in my RV and was feeling the vibration a lot. Now it is no more than just a little tiny vibrations which is nothing comparing to what that was before.
It looks like this method works ! I will get prop balanced and hope to get even better results.
Thank you to all who contributed and shared this valuable solution here at VAF.
 
For those interested in what the ~$2000 tool looks like, here is the page from Lycoming's Special Tools catalog.
 

Attachments

  • Lycoming Tools - P-20.pdf
    123.7 KB · Views: 52
Back
Top