One thing that you must keep in mind when you lay your panel out is that in an emergency (high stress), your fine motor skills are one of the first thing to out the window. Thus, be careful about putting switches, buttons, and breakers really close together. I have somewhat large hands so I was selective in my spacing.
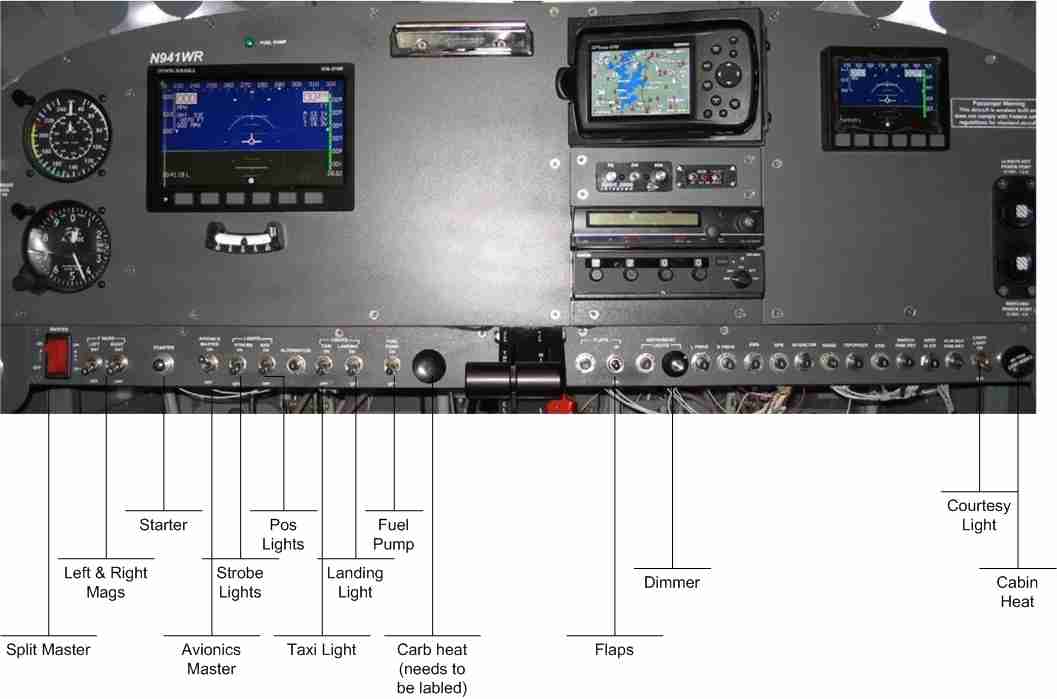
Although updated since this picture was taken, the switch position and functions have not changed.

(click to enlarge)
I planned my panel layout based on "Phase of Flight".
This means that all the switches are grouped based on what I'm doing in flight, not by putting all the light switches together.
On my side-by-side RV, I have the Cessna style split master all the way on the left. Immediately to the right are the two igntion toggle switches, and to the right of that is the starter button.
Next is the avionics master.
Then comes the other key switches:
Strobes lights
Position lights
Taxi light
Landing light
Fuel pump
Carb heat
Throttle
Mixture
Flap switch
The interior lights, cabin heat, etc. are all the way over on the right side, where the passenger can play with them.
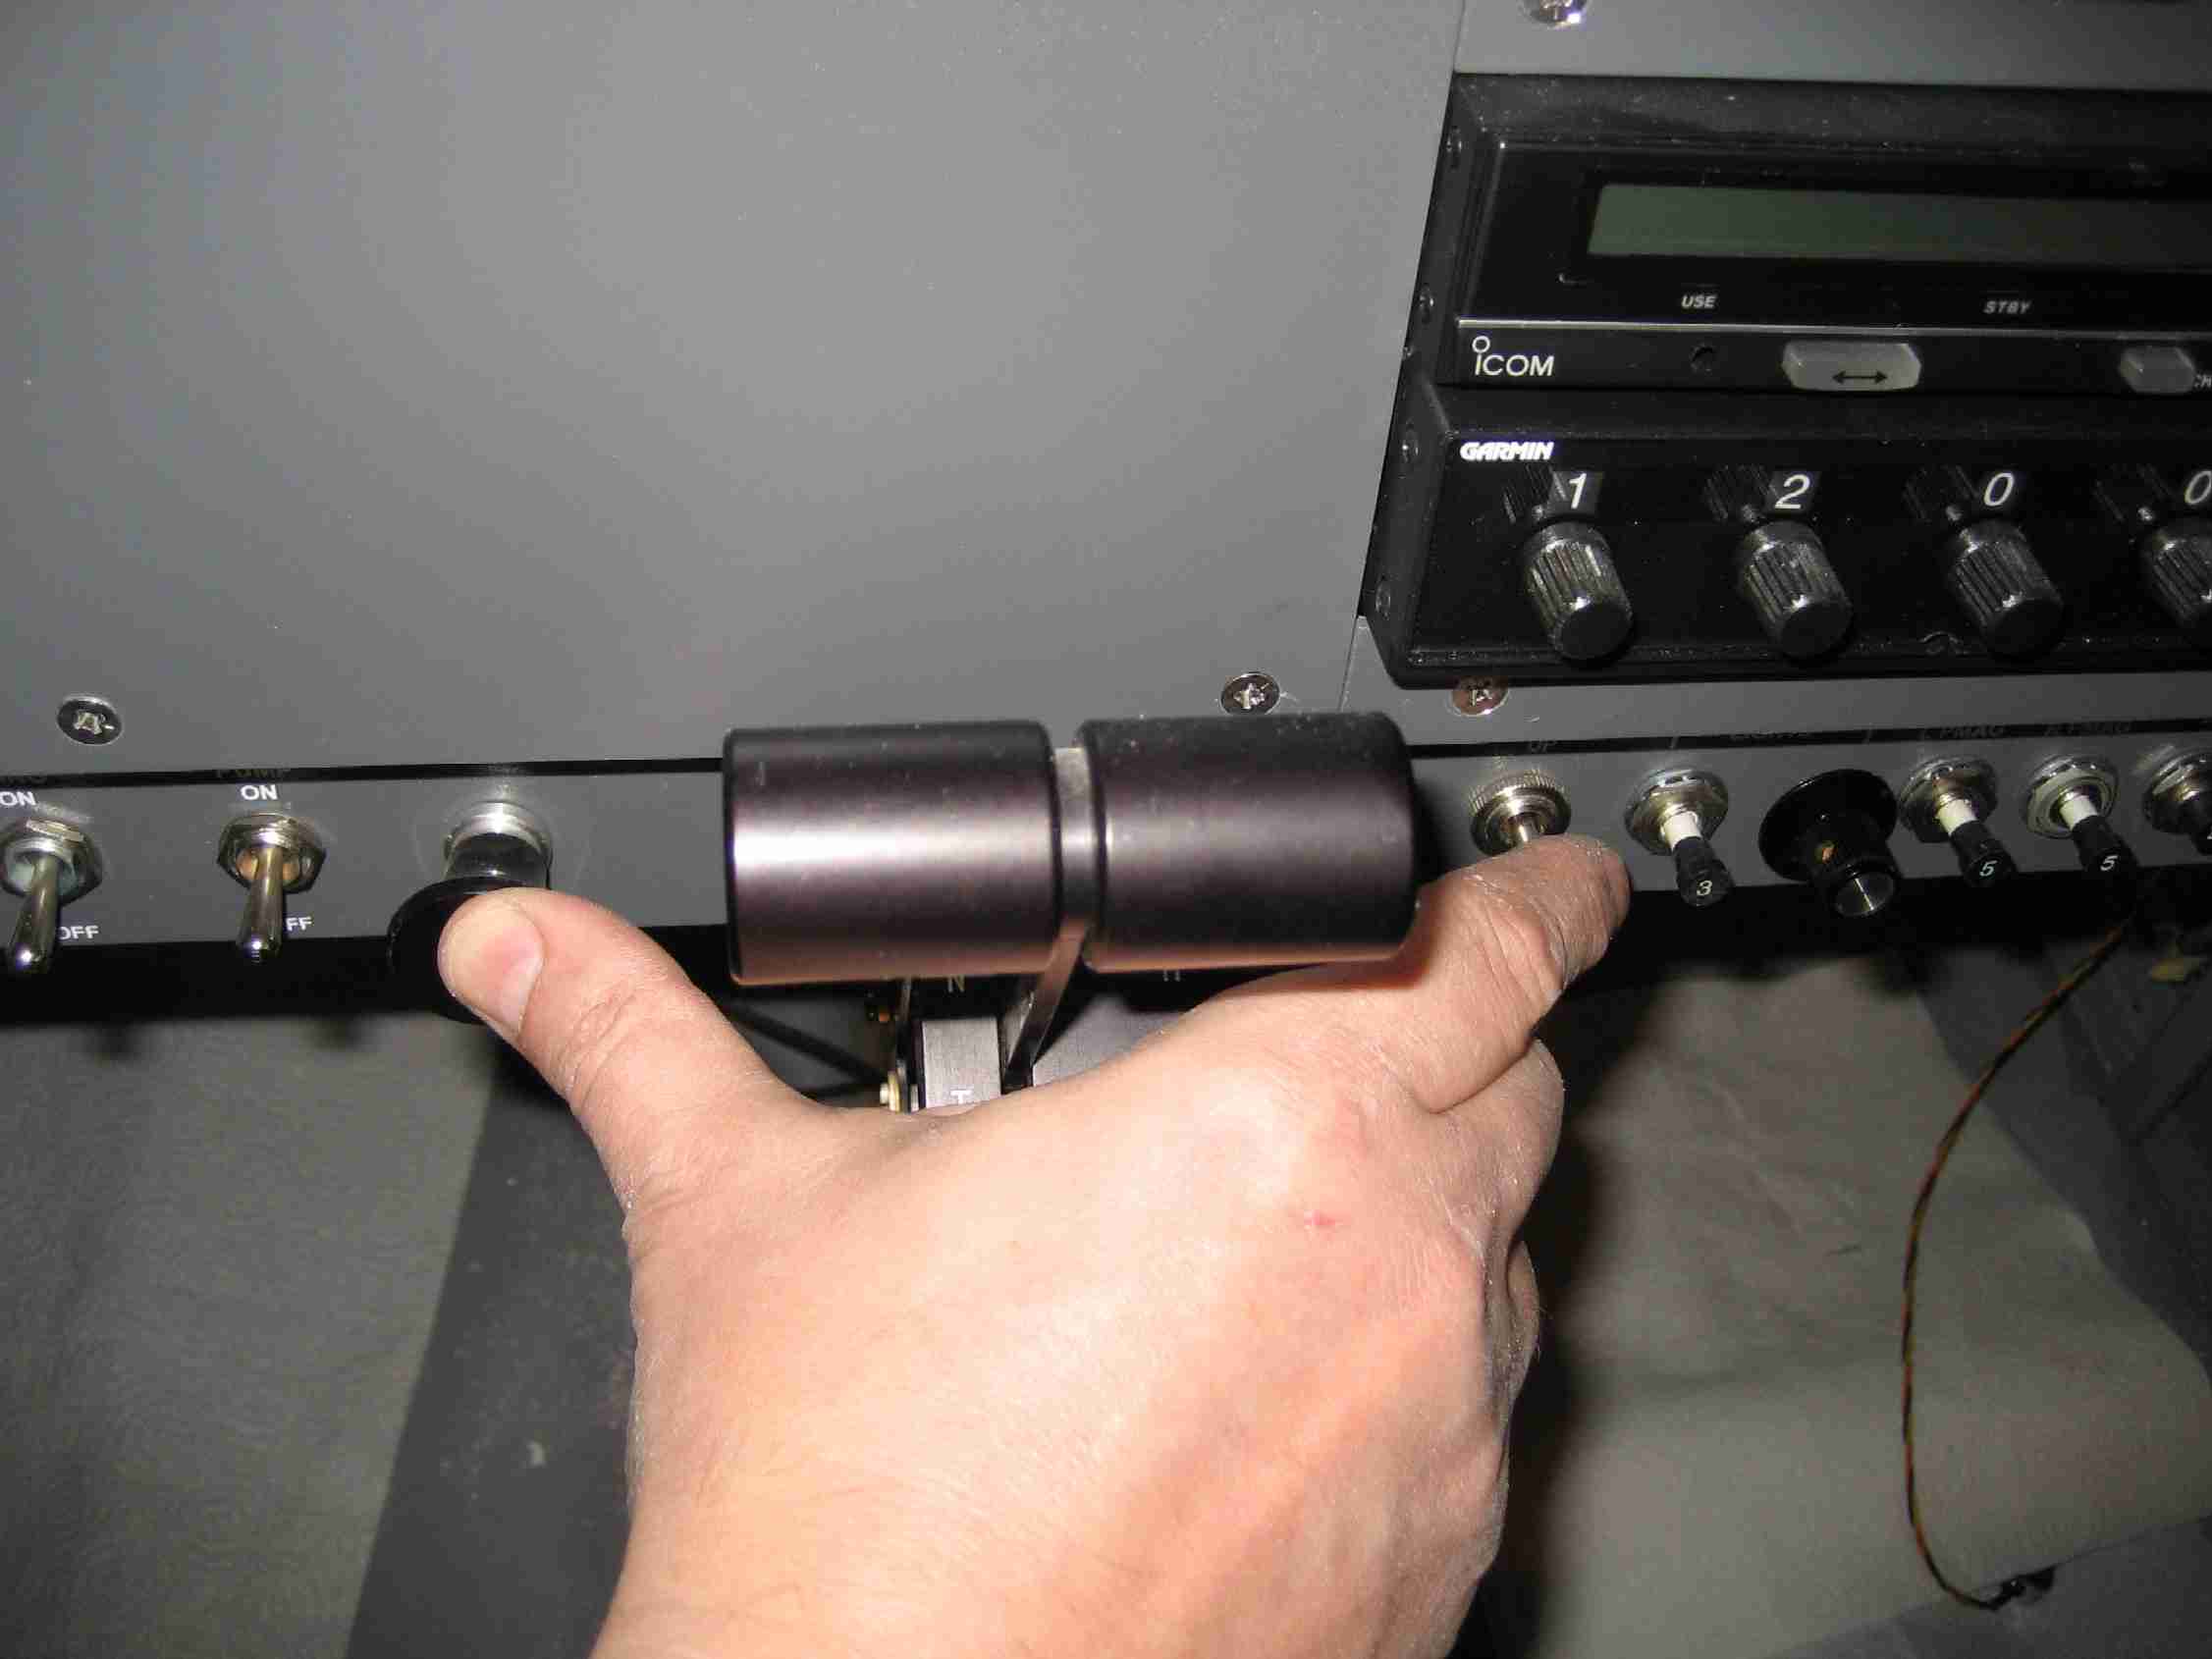
When I am in the pattern, my hand rests on the throttle quadrant and when it is time to land, I flip on the taxi and landing lights, fuel pump, pull out the carb heat, and my hand goes back on the throttle quadrant.
Without moving my hand off the quadrant, I can toggle down the flaps with the index finger of my right hand.
On a go-around, I can push and hold the throttle and mixture full forward, my thumb pushes the carb heat in, and my index fingers toggles the flaps up, all without moving my hand.
In bumpy air, this works really well as I'm still resting my hand on the quadrant and don't have to move it to lower the flaps.
Although I have redon my panel a few times, the switch placement has not changed in 11 years and has proven to be well thought out.
Here is a picture of my had on the throttle quadrant:

(Click to enlarge)