What's new
Van's Air Force

Don't miss anything! Register now for full access to the definitive RV support community.

Windscreen Fairing Alternative

drone_pilot

Well Known Member
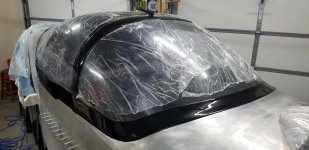
I have noticed on several finished and flying RV's that the glassed fairing at the base of the windscreens is cracking. My Cessna has a strip of aluminum to fair the base of the windscreen. I was just wondering if anyone out there has tried any alternatives to "glassing" the windscreen fairing to the windscreen? If so, any pics? Likewise, are there any known ways to prevent the cracks from occurring?

The last RV I saw had a beautiful paint job and now cracks are forming at the base of the windscreen. I just want to put some thought into this as I am just about to start cutting the canopy.
 
I had similar cracks. In my case it appeared to be a result of using Poly Fibre Super Fil from Aircraft Spruce. It has all shrunk. Fortunately I didn't paint yet, but I would stay away from that product. It would be interesting to know if others with cracks also used it.
 
A few have done aluminum windscreen fairings, overall I thought they took less time than finishing the glasswork. Google "RV aluminum windscreen fairings," there is a good article in an old RVAitor about how to make them.
My version:
E2A84C6A-3862-4ACB-89C7-0BA8CB289B75_zpshs7muzyk.jpg
 
I had similar cracks. In my case it appeared to be a result of using Poly Fibre Super Fil from Aircraft Spruce. It has all shrunk. Fortunately I didn't paint yet, but I would stay away from that product. It would be interesting to know if others with cracks also used it.

Hmmm... They claim it will not shrink or crack: http://www.polyfiber.com/epoxy/

I wonder if they have changed it since you used it. I am interested as I used it on my empennage tips and rear slider skirt.

Chris
 
I chose to do all metal. I used an English Wheel to form them. I made the upper bow out of .040 for additional support when folks inadvertently brace themselves on it getting in and out.
I tried to avoid glass to metal joints on my airplane. If it is a plastic part, like a tip, there is a joint. Properly done fiberglass windscreen fairings look great and will stand up well. I still prefer to see the joint and if I was doing them in glass, I would make them a removable part, or have that appearance.
 
I had good success making metal fairings by following the method described in the 21 Years of the RV-ator, "Aluminum Windscreen Fairing". No English wheel needed (even though I have one in the shop).

The only trick is measuring exactly the angle between the upper deck and the windscreen every two inches and bending the lower fairing flange to exactly those same angles.

ZFWQvsw.jpg


1qQieaW.jpg


suqp0JW.jpg


The lower fairing is made from 2 pieces of 12" x 36" .025" 2024-T3 alclad. The upper fairing is made from one piece of 12" x 72" .032" 2024-T3 alclad.

Both fairings are bonded to the windscreen with Sikaflex-295i UV adhesive.
 
Last edited:
I had good success making metal fairings by following exactly the method described in the "21 Years of the RV-ator", no English wheel needed (even though I have one in the shop).

The only trick is measuring exactly the angle between the upper deck and the windscreen every two inches and bending the lower fairing flange to exactly those same angles.

3b368a73-365c-476c-8c3e-e5e863ddb45a.jpg


DSCN2978.jpg


The lower fairing is made from 2 pieces of 12" x 36" .025" 2024-T3 alclad. The upper fairing is made from one piece of 12" x 72" .032" 2024-T3 alclad.

Both fairings are bonded to the windscreen with Sikaflex-295i UV adhesive.

Very nicely done. I riveted and screwed mine and then used Sika as a sealant only. It was in the early days before folks where doing the Sika thing.
 
I had good success making metal fairings by following the method described in the "21 Years of the RV-ator", no English wheel needed (even though I have one in the shop).

The only trick is measuring exactly the angle between the upper deck and the windscreen every two inches and bending the lower fairing flange to exactly those same angles.

3b368a73-365c-476c-8c3e-e5e863ddb45a.jpg


DSCN2978.jpg


The lower fairing is made from 2 pieces of 12" x 36" .025" 2024-T3 alclad. The upper fairing is made from one piece of 12" x 72" .032" 2024-T3 alclad.

Both fairings are bonded to the windscreen with Sikaflex-295i UV adhesive.

That looks great! I'm in the process of repairing mine with carbon fiber but if I could start from scratch there is no doubt I would try to find somebody that had the ability to do as you did with the aluminum . The weakest point with fiberglass is at the top where the canopy closes to the windscreen plus people including myself sometimes either grab the top edge or hit it with there feet while exiting then it breaks off.
 
They claimed that when I used it too. I may have had a bad batch. However, these days I only use West Systems and make my own.

It is a polyester filler, and they all shrink - just some faster than others. Better to use micro with epoxy. It just does not set up as fast as the poly esters.

I am considering aluminum too, it is in the 6/97 RVAtor. You should buy the CD version all 27 yrs - searchable too!
 
"Old school" metal fairing. Although not necessary, as shown in Jim's fine work above, the "Wheel" allows you to put a small arc in the bow to slightly better match the windscreen/canopy intersection and add rigidity. It also allows you to ruin some metal as you get to learn a new skill! (Especially with 2024T3)
.032 with .040 bow, sealed with a layer of Sika under.
24m6k3c.jpg
 
I did a bit of a hybrid. I used aluminum over the top of the roll bar, which extends back over the slider portion of plexiglass. However, I used glass and epoxy for the fairing between the top fuse skin and the base of the windscreen.

What I did differently from typical was to lay it up on the fuse, but remove it for finishing. I put it back on for good when it was essentially ready to paint. I used a few pop rivets, and a layer of epoxy to seal it to the fuse and windscreen. I do not have a decent picture of it to post, but I'd do the same thing again. Sure makes getting it finished easier, and the seams between it and the fuse and windscreen are good places for expansion when necessary.
 
Winshield Fairing

Hello Gents

Anyone with an RV-4 has pictures of their front fairing (On how they finished the front of their canopy )??

I will have to redo mine on my incoming canopy replacement and I'm looking for ideas..

On my previous and present canopy, I re-used the old fiberglass fairing and reglassed it in place but this time around I will be redoing the complete canopy and will be using the old one in the meantime..

Thanks in advance

Bruno
[email protected]
 
I did mine in metal also. I followed the RVaitor artical, but not quite in such a detailed method.. It really turned out pretty easy to do, and the first pieces I made, ended up as the finished ones..

https://picasaweb.google.com/lh/photo/8s3pAMqprMH7DnJWxBk_2tMTjNZETYmyPJy0liipFm0?feat=directlink

I modified my flange forming tool by stacking the wheels to allow a larger flange formed.
https://picasaweb.google.com/lh/photo/UnlEjxQn4kOi8UQJnq_eI9MTjNZETYmyPJy0liipFm0?feat=directlink
The form out of a 2 X 4
https://picasaweb.google.com/lh/photo/G52ns_qgQfKbtKTWwWt5gtMTjNZETYmyPJy0liipFm0?feat=directlink

Sheldon RV6A
 
Last edited:
I used the 21 years of the RVator method too. I like the results and it only took 2 work sessions on one weekend.

8295863544ef7bcbb63ead.jpg
 
Tip Up !

Thanks for that picture, Bill. I was wondering about the tip up. I read your log and see that you did pay attention to the visibility. I think Van said that he allowed one inch for the attachment above the skin. What did you end up with?

Did you "proseal" the contact to both the canopy and the skin? Were you able to access all the rivets (bucking) after installation of the stiffener? Mine is already installed and painted :confused:.

Hi Bill,
I dont remember exact dimensions. I think it is about 1.5 inches up the windshield. Could be done shorter if desired.
Yes, proseal was on both boot cowl and canopy. Most rivets were driven but it think 2 on each side were blind pop rivets.

carry on !
 
Fiberglass - layed up on plane but removed for sanding, finishing, etc.

Here's a shot of a fiberglass fairing, finished off the plane, and put on just before paint.

IMG_20150519_190850442_HDR.jpg
 
Does anyone have a copy of this article I can download? Or a location or website I can go to in order to read up on how to do this?

Thanks
 
Bonded Fiberglass Windshield Trim

I also layed up and bonded it.
Several articles in Kitplanes on how it was done. Links on my blog if you don't have a subscription.
20200408_114456.jpg
 
Howdy everyone. Another alternative is fuel tank sealant. Tape off the area to the size you want the "fairing" and form the shape to your liking. Paintable.

Video; start about the 2:00 mark.

https://www.youtube.com/watch?v=FE5znWj6pxk

I ended up adding another layer of sealant to fill/shape/enlarge the seal area.

Well, they are experimental aircraft after all, but I certainly wouldn't recommend this method of windscreen attachment for so many reasons, I don't even know where to start.........
 
Does anyone have a copy of this article I can download? Or a location or website I can go to in order to read up on how to do this?

Thanks

This was me, sorry I lost my phone and sign on info so I used a new profile to post…… but I’m back. So again, does anyone have the article or have a link for it that details the aluminum process for the windscreen fairings?? Also, I honestly would not feel comfortable with a fuel tank sealant attachment, thanks though.
 
Back
Top